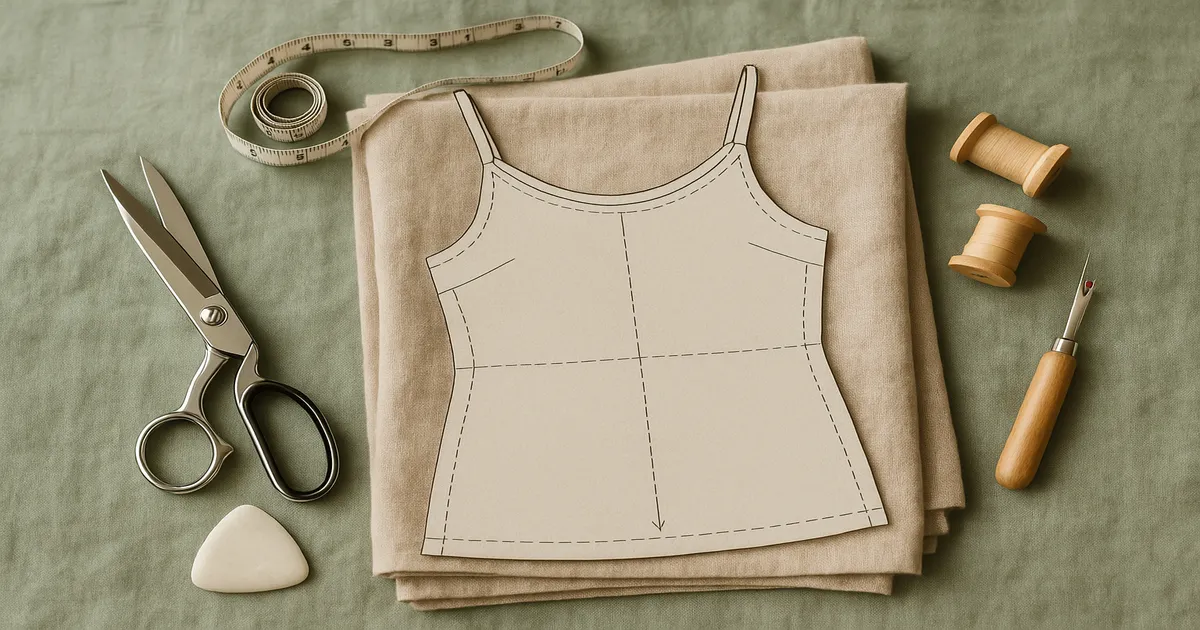
Quick Answer: To do an FBA on a strappy top or dress, slash and spread the front pattern piece — but redirect Slash Line A toward the side seam instead of the armhole. That one change keeps your neckline and strap placement intact. Size by your high bust, calculate the spread from the difference between your high and full bust measurements, and always sew a muslin before cutting into fashion fabric.
Strappy tops and dresses are some of the trickiest garments to fit for a fuller bust, and most standard FBA tutorials will steer you wrong if you follow them without adapting the method. The reason is simple: those tutorials assume a set-in sleeve with a standard armhole, and they direct you to slash toward that armhole to redistribute ease. On a strappy top, the armhole is the design. Slash toward it and you’ll distort the entire silhouette and shift your strap attachment points.
So if you’ve been searching for how to do an FBA on strappy tops and dresses, the answer starts with redirecting that slash line — and everything else flows from there.
Do You Actually Need an FBA?
High Bust vs. Full Bust
You need two measurements before touching a pattern:
- High bust: Wrap the tape above your bust, under your arms, and across your upper chest. This is how most commercial patterns are sized.
- Full bust: Measure around the fullest part of your bust, keeping the tape parallel to the floor.
If the difference is less than about 2.5 inches (6.4 cm), you probably don’t need an FBA — just size by high bust and you’re fine. More than that, and you do.
Locating Your Bust Apex
The apex (your nipple point) is the pivot for the entire adjustment. Measure two things: the distance from center front to apex, and the distance from your shoulder or strap attachment point straight down to apex. Mark both on your pattern piece before you draw a single slash line. Skipping this step is the most reliable way to end up with added volume in completely the wrong place.
How Much to Add
Subtract your high bust from your full bust. Each inch of difference is roughly one cup size, and each cup size translates to about 1 inch (2.5 cm) added to the front pattern piece.
Example: 40-inch full bust minus 36-inch high bust = 4-inch difference ≈ D cup. You’d spread Slash Line B by 2 inches (5.1 cm) — that’s half the total adjustment, because you’re only working on one front piece.
One thing most tutorials gloss over: your FBA amount should match the difference between your full bust and the pattern’s finished bust measurement, not just your raw body measurements. Commercial patterns already have 2–3 inches (5–7.6 cm) of ease built in. Check your pattern envelope for finished measurements and do the math from there, or you’ll end up with a sloppy, over-eased bust.
Tools You Need Before You Start
Pattern Drafting
- Swedish tracing paper or dotted pattern paper (a roll of medical examination paper works fine too)
- French curve ruler — non-negotiable for redrawing necklines
- Clear gridded ruler, 2 × 18 inches
- Flexible tape measure, at least 60 inches long
- Sharp pencil or fine-tip marker (skip the ballpoint — it bleeds through)
- Low-tack tape or pattern tape
- Pattern weights
Sewing Your Muslin
- Fabric scissors or a rotary cutter and self-healing cutting mat
- Sewing machine with a universal needle, size 80/12
- All-purpose polyester thread
- Seam gauge and tailor’s chalk for marking the apex on fabric
For Stretch or Knit Strappy Tops
Knits need a few extras: a ballpoint or stretch needle (size 75/11 or 90/14), woolly nylon thread for your serger loopers, and a walking foot for feeding the fabric evenly. A coverstitch machine is great for hems if you have one, but it’s not essential.
How to Do an FBA on Strappy Tops: Step-by-Step
Step 1: Trace Your Pattern Piece
Always work on a copy. Trace the front bodice piece onto pattern paper, transferring all grain lines, notches, dart legs, and your marked apex point.
Step 2: Mark Your Slash Lines
This is where the method diverges from a standard FBA — and it’s the whole point.
No existing bust dart:
- Slash Line A (horizontal): From the apex toward the side seam, stopping ¼ inch (6 mm) from the edge. That little uncut bit is your hinge.
- Slash Line B (vertical): From the apex straight down to the hem, cut all the way through.
Existing bust dart (side-bust or waist dart):
- Draw Slash Line A along the center of the dart from apex toward the side seam, stopping ¼ inch (6 mm) from the edge.
- Slash Line B still runs from apex straight down to hem.
In a standard sleeved FBA, Slash Line A goes toward the armhole. On a strappy top, redirect it toward the side seam. Do this and your neckline stays intact. Don’t, and you’ll be fighting distortion for the rest of the afternoon.
Step 3: Cut the Slash Lines
Cut Slash Line B all the way through from hem to apex. Cut Slash Line A from the apex toward the side seam, stopping at your ¼-inch hinge.
Step 4: Spread the Pattern
Place the cut piece on fresh pattern paper. Spread the two sections of Slash Line B apart by your FBA amount and tape everything down. The hinge will cause the upper section to rotate slightly — let it. That rotation is what moves the ease into the right position. Don’t fight it.
Step 5: Blend the Side Seam
The rotation creates a jog in the side seam. Redraw a smooth, continuous line connecting the upper and lower sections, blending the curve over at least 3–4 inches (7.6–10.2 cm). A gradual curve sews up much better than a sharp angle.
Step 6: Restore the Hem Line
Draw a smooth, blended hem across the gap created by the spread. Straight hem = straight line; curved hem = use your French curve ruler.
Step 7: Check Neckline and Strap Placement
Because you slashed toward the side seam, the neckline should be largely undisturbed — but measure anyway. Compare the distance between strap attachment points on your adjusted piece and your original. They should be identical. If anything has shifted, blend the neckline back to the original curve with your French curve ruler.
Step 8: Redraw Any Darts
If the original had a bust dart, the spread has widened it, which is exactly right. Redraw the dart legs so they’re equal in length, with the dart point aimed toward — but stopping about 1 inch (2.5 cm) short of — the apex.
Step 9: Adjust Facing and Lining Pieces
Re-trace every facing, lining, or self-facing piece from your adjusted front. If you sew the original unadjusted facing to your new front, it’ll pull the neckline inward and look terrible. This step is easy to forget and causes a disproportionate amount of heartache.
Step 10: Sew a Muslin
Cut and sew a test version in cheap fabric — calico, plain muslin, whatever you have. Check for diagonal drag lines across the bust, straps lying flat without pulling, center front hanging straight, and the apex point actually aligning with your apex. Fix any issues on the paper pattern before cutting into fashion fabric.
Special Cases
Gathered or smocked bust styles are the easiest. The extra width simply becomes more gathering — no dart redrawing needed. Spread, blend the side seam, done.
Halter necks are the most sensitive. Even a small distortion shifts where the strap connects, which changes how the whole garment hangs. Be especially careful with Step 7 and double-check strap placement measurements before and after.
Camisoles and spaghetti-strap tops often have minimal shaping, which makes the side-seam redirect even more important. There’s nowhere to hide a distorted curve on a cami — it’s right there in plain sight.
Stretch knit strappy tops have inherent stretch ease, so your FBA amount is often smaller than it would be for the same garment in a woven. Make the adjustment in smaller increments and tissue-fit between stages.
Common Mistakes (and How to Fix Them)
Sizing up for the bust instead of using high bust. If you choose your size based on your full bust, the shoulders and strap placement will be too wide. Size by high bust, then do the FBA.
Slashing toward the armhole. The single most common mistake when sewists follow a standard FBA tutorial without adapting it. Redirect Slash Line A to the side seam.
Skipping the apex measurement. Guessing where the apex is leads to added volume in the wrong place. Measure, mark, then slash.
Forgetting to adjust facing and lining pieces. The facing has to match your adjusted front. Full stop.
Not truing up the side seams. After an FBA, the front side seam is usually longer than the back. Check the lengths before sewing or your garment will twist.
Adding too much ease. Your FBA amount is the difference between your full bust and the pattern’s finished bust measurement — not just your body measurement vs. the size chart.
Skipping the muslin. I know. Do it anyway.
Frequently Asked Questions About FBA on Strappy Tops
Can you do an FBA on a strappy top with no darts?
Yes. When there’s no existing dart, Slash Line B runs from the apex straight to the hem and the spread creates a wedge of extra width. On a gathered style, that extra width becomes additional gathering. On an undarted fitted style, you’ll fold the extra into a small dart or ease it into a seam — but the slash-and-spread process works exactly the same way.
How do I stop an FBA from distorting the neckline on a strappy top?
Redirect Slash Line A toward the side seam instead of the armhole. That’s the main fix. After completing the spread, compare the neckline curve on your adjusted piece to the original and use a French curve ruler to blend any slight distortion back to the original shape.
Should I do an FBA on a stretch knit strappy top or just size up?
An FBA is almost always the better choice. Sizing up gives you extra fabric everywhere — shoulders, straps, side seams — and on a strappy top, that’s immediately obvious. The FBA amount for a knit will be smaller than for a woven, but the adjustment is still worth doing for a clean fit.
How much do I spread the pattern for a full bust adjustment?
The spread equals the difference between your full bust and the pattern’s finished bust measurement. As a rough guide, each cup size above the pattern’s default (usually a B cup) adds about 1 inch (2.5 cm) to the front piece — so a D-cup adjustment on a B-cup pattern means spreading 2 inches (5.1 cm). Always check the pattern envelope for finished measurements rather than relying on the size chart alone.
Do I need to adjust the back pattern piece when doing an FBA on a strappy dress?
Not usually, but you do need to true up the side seam lengths. An FBA lengthens the front side seam, so you’ll either ease the front to the back (not ideal on wovens) or add a small amount to the back side seam to match. Some sewists also need a small back adjustment if the dress is fitted through the back, but the FBA itself is a front-only alteration.