Quick Answer: A 16-patch block — 16 equal squares in a 4×4 grid — is most commonly called the “plain 16-patch” or simply the “16-patch block.” But American quilt block naming was never standardized, so the same block can carry dozens of regional names. Barbara Brackman’s Encyclopedia of Pieced Quilt Patterns is the closest thing to an authoritative reference. If you can’t find your block’s name, you’re in very good company.
Does This 16-Patch Have a Name? (Yes — and Also No)
The most common name for a simple 4×4 grid of equal squares is the plain 16-patch or just the 16-patch block. Most quilters will know exactly what you mean. But if you’re trying to pin down a specific historical name for a specific color arrangement — say, a diagonal-stripe version you found in your grandmother’s quilt — you may be chasing something that no longer exists, or that only ever existed in one county in Missouri in 1934.
That’s not a failure on your part. It’s just how American quilt block naming worked: whoever was writing about blocks at the time named them — a newspaper columnist, a pattern catalog, a guild newsletter. There was no central authority, no registry, no standards. The same block could be “Grandmother’s Checkerboard” in Ohio and “Four-Corners Patch” in Texas. Barbara Brackman’s Encyclopedia of Pieced Quilt Patterns catalogs over 4,000 named blocks and remains the closest thing quilters have to a definitive reference. Even it doesn’t resolve every ambiguity — it just documents them honestly.
What Exactly Is a 16-Patch Quilt Block?
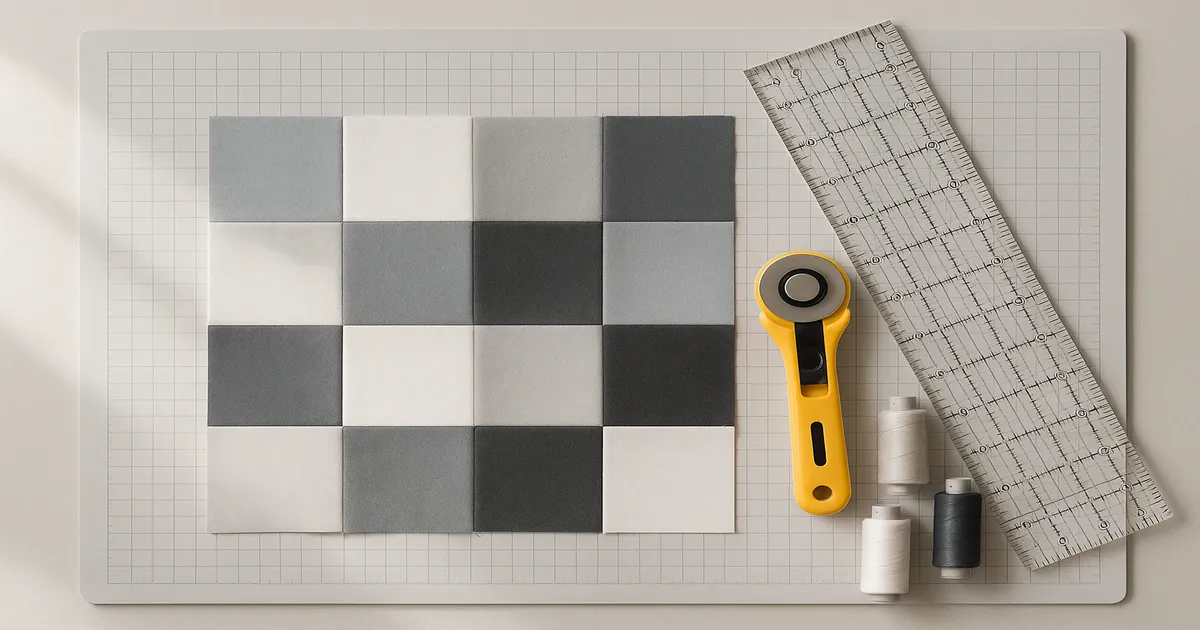
A 16-patch block is exactly what it sounds like: 16 equal squares in a 4×4 grid. No partial seams, no triangles (in the plain version), no curved cuts. It’s one of the most structurally simple blocks in the quilting canon, which is a big part of why it’s been around since at least the 1840s.
For the most common finished size — a 12-inch (30.5 cm) block — each small square finishes at 3 inches (7.6 cm) and gets cut at 3½ inches (8.9 cm) to include the ¼-inch seam allowance on all sides. The math scales cleanly: a 16-inch block uses 4-inch finished squares; an 8-inch block uses 2-inch finished squares.
The 16-patch also belongs to a logical family. The 4-patch is a 2×2 grid, the 9-patch is a 3×3 grid, and the 16-patch is a 4×4 grid. A 16-patch divides naturally into four 4-patch units — that’s not just a fun fact, it’s why the block lends itself so well to strip-piecing.
Common Variations
The plain two-color checkerboard is the most recognizable version — alternating lights and darks in every row and column. But there are others worth knowing:
- Four-color quadrant grouping — colors cluster in quadrants, creating a bolder, blockier look
- Diagonal stripe — colors arranged so the eye travels across the block diagonally
- HST substitution — swap some or all plain squares for half-square triangles and you get Pinwheel, Broken Dishes, or Hourglass effects arranged in a 4×4 grid
These variations are exactly why “does this 16-patch have a name?” is such a common question. A plain checkerboard and a pinwheel-substitution version are both technically 16-patch blocks, but they look completely different and may carry completely different names.
Why Your 16-Patch Might Have Multiple Names — or None at All
Over 4,000 named blocks appear in Brackman’s encyclopedia, and many 16-patch variations show up under multiple names. Geography mattered. Era mattered. Whether the pattern came from a magazine, a catalog, or a local guild mattered. A block that was “Grandmother’s Cross” in one region might be “Double Four-Patch” in another — and neither name is technically wrong.
Brackman’s encyclopedia organizes blocks by structural grid and subdivision type, so you can search by construction rather than name. If you have a 16-patch with a specific arrangement, look under the 4×4 grid section and compare the line drawings. It’s not a perfect system, but it’s the best one we have.
Some blocks genuinely have lost names — the only people who knew what they were called are gone, and no pattern publication ever documented them. Others were named informally within a single community and never spread further. Accepting that is part of being a serious quilter. Not everything has an answer, and that’s okay.
Reddit’s r/quilting, various Facebook quilting groups, and Instagram have created a kind of distributed naming database that didn’t exist before. Post a clear photo with a description of the color arrangement and grid structure, and someone has almost certainly seen it. It’s become a genuine hobby for some quilters — historical block identification as a form of textile archaeology.
How to Make a 16-Patch Quilt Block
Materials
Use 100% quilting-weight cotton — Kona Cotton and Moda Bella Solids are both reliable, consistent choices. For a single 12-inch block in two colors, you need about ¼ yard (22.9 cm) of each color. Going scrappy? Any piece at least 4 × 4 inches (10.2 × 10.2 cm) will yield one square with room to true it up.
Don’t mix quilting cotton with heavier fabrics like canvas or lighter ones like voile. They feed differently, press differently, and the block will show it.
For thread, use 50-weight cotton in a neutral gray or cream — Aurifil 50wt is the go-to for most serious piecers. Skip polyester thread for piecing cotton; it’s stronger than the fabric and can cause tearing under stress. Use a size 80/12 universal or 75/11 quilting needle, and replace it every 8–10 hours of sewing. A dull needle causes more piecing problems than most quilters realize.
For cutting, you need a 45mm rotary cutter , an 18 × 24-inch self-healing mat, a 6 × 24-inch strip ruler, and a 6½-inch square ruler for squaring up blocks. Hand-cut squares introduce compounding error across 16 pieces. Don’t do it.
Method 1: Traditional Cut-and-Sew (Best for Beginners)
- Cut 16 squares at 3½ × 3½ inches (8.9 × 8.9 cm). For a classic two-color checkerboard, cut 8 of Color A and 8 of Color B.
- Lay out all 16 squares in your desired arrangement. Take a photo before you touch anything.
- Sew into rows: chain-piece squares into 4 rows of 4, using a consistent ¼-inch seam allowance throughout.
- Press each row before joining — alternate pressing direction row by row (Row 1 seams right, Row 2 seams left) so seams nest at the junctions.