Quick Answer: To sew on a patch, position it on your garment, secure it with pins or fabric glue, then stitch around the entire perimeter — by hand using a whip stitch or blanket stitch, or by machine using a straight stitch or zigzag. If your patch is iron-on, always reinforce it with stitching; the adhesive alone won’t survive regular washing. This article covers both methods in full.
Knowing how to sew on a patch is one of those skills that looks simple until you’re staring at a puckered, lopsided mess after the first wash. The details matter — needle choice, thread tension, whether you pre-washed the patch. Get them right and the patch outlasts the garment. Skip them and you’re doing it again in two weeks. Whether you’re repairing a blown-out knee on your kid’s jeans, attaching a merit badge to a scout uniform, or personalizing a jacket, this guide covers every step.
Types of Patches and When to Use Each
Embroidered and woven patches are the most common — the kind sold at craft stores and online, with a raised thread design on a twill or felt backing. Embroidered patches have a textured surface; woven patches have finer detail because the design is woven directly into the fabric rather than built up with thread on top. Both attach well by hand or machine.
Iron-on patches have a thermoplastic adhesive on the back that bonds with heat. Convenient, yes — but that adhesive is not a permanent fix. It starts peeling after 5 to 10 washes, faster if the garment goes through a dryer. Always reinforce iron-on patches with stitching. Think of the iron-on step as a very good temporary hold, nothing more.
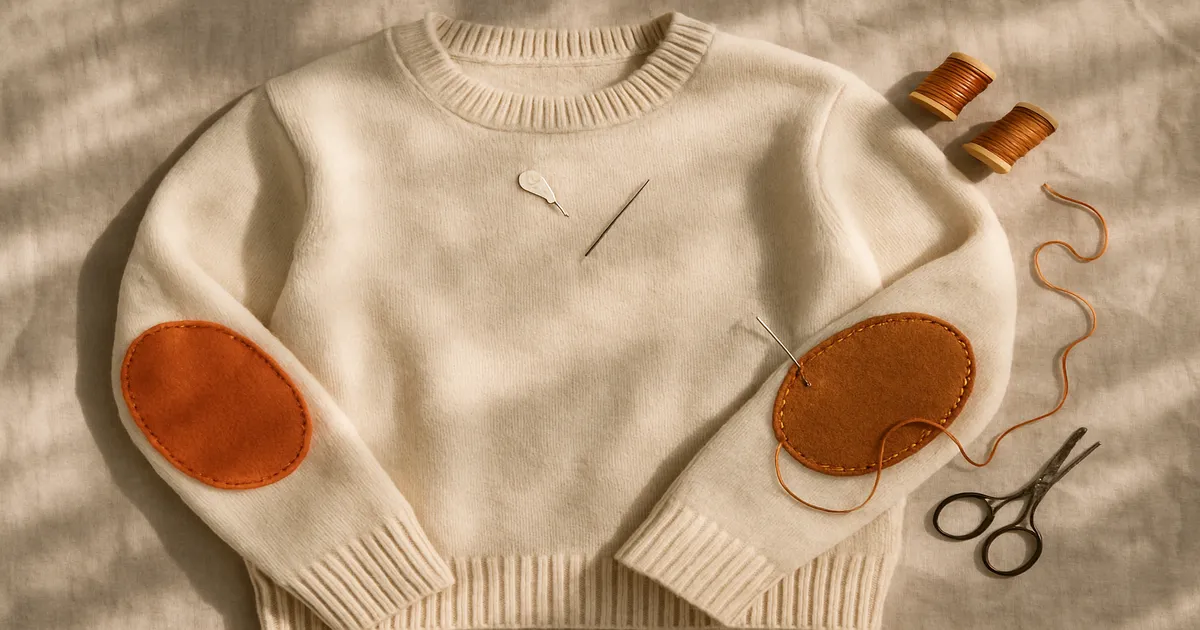
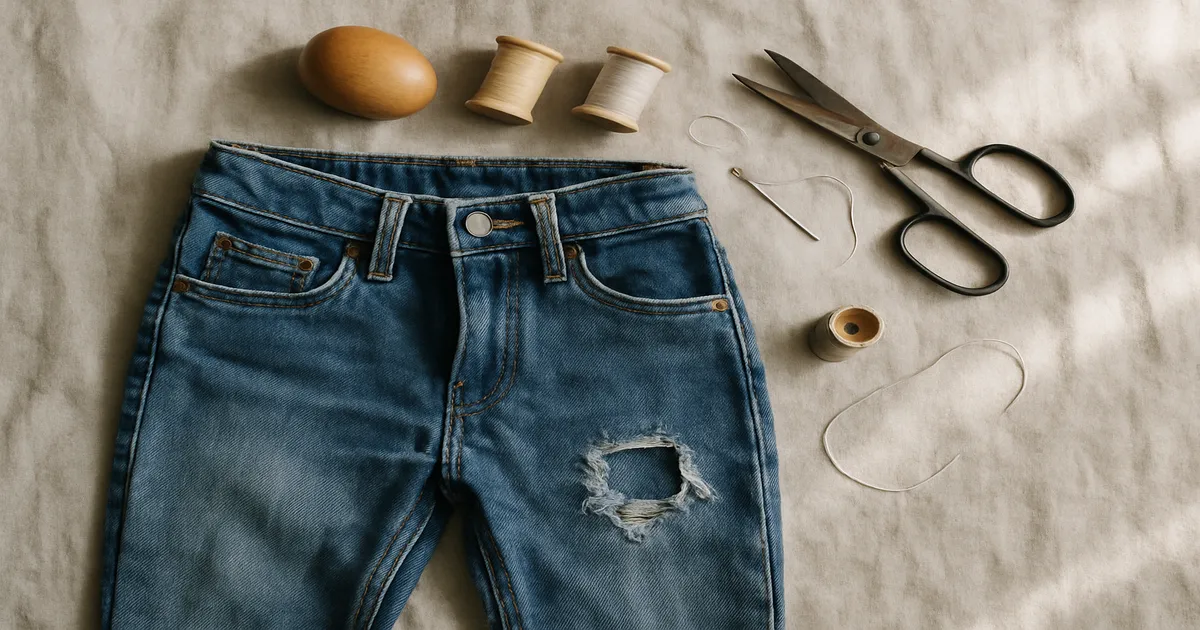
Fabric and felt patches are cut from matching or contrasting material and are the go-to for functional repairs — covering a hole in denim, reinforcing a worn elbow. Felt is the easiest to work with because it doesn’t fray, which makes it ideal for beginners. Fabric patches cut from woven material should be backed with fusible interfacing before attaching, or the edges will ravel. (Pellon 805 Wonder-Under)
Leather, printed, and Velcro patches each have their quirks. Leather patches need a glover’s needle for hand sewing and a leather machine needle — a standard needle will skip stitches and may shred the leather edge. Printed (sublimated) patches are sewn exactly like embroidered ones. Velcro patches are used on tactical gear and uniforms where you need to swap patches out; sew the loop (soft) side to the garment and the hook side stays on the patch.
Tools You’ll Actually Need
Needle choice matters more than most people think. A fine needle on heavy denim will snap; a heavy needle on a lightweight shirt leaves visible puncture holes.
| Fabric | Hand Needle | Machine Needle |
|---|---|---|
| Lightweight (shirt, blouse) | Sharps size 9–10 | Universal 70/10 or 75/11 |
| Medium (chino, flannel) | Sharps size 7–8 | Universal 80/12 |
| Heavy (denim, canvas) | Sharps size 7–8 | Denim 90/14 or 100/16 |
| Very heavy (canvas, upholstery) | Chenille size 18–22 | Denim 110/18 |
| Leather patches | Glover’s needle | Leather needle 90/14–100/16 |
| Embroidered patches on knits | Ballpoint size 8 | Stretch 75/11 or 90/14 |
Replace your machine needle every 8 to 10 hours of sewing, or whenever you hear a faint popping sound as it enters the fabric — that’s a dull needle, and it causes skipped stitches.
Thread: All-purpose 50wt polyester is your default for almost everything. It’s stronger than cotton, has a slight stretch that accommodates fabric movement, and comes in every color. Gutermann Sew-All and Mettler are both reliably consistent. For denim or canvas, step up to a heavy-duty 30wt or 40wt thread. For decorative hand-sewing, 2 to 3 strands of embroidery floss give you a bold, visible stitch line that looks intentional. If you want the stitching to disappear, monofilament thread in the top with regular thread in the bobbin does the job.
Other notions you’ll want on hand:
- Seam gauge or ruler
- Tailor’s chalk or water-soluble fabric marker
- Glass-head straight pins (they won’t melt under an iron)
- Fabric glue stick
- Double-sided basting tape, ¼-inch (6mm) width
- Iron and pressing board; tailor’s ham for curved areas
- Thimble — leather for comfort, metal for pushing through thick layers
- 4–6 inch embroidery hoop for hand-sewing on lightweight or stretchy fabrics
- Seam ripper, because mistakes happen
Preparing Your Patch and Garment
Pre-wash everything. This is the step people skip, and it’s the main reason patches pucker after the first wash. Wash both the garment and the patch at the temperature you’ll use going forward. If either one is going to shrink, you want that to happen before they’re attached to each other.
Press the garment flat. Iron the area where the patch will go until it’s completely smooth. Any wrinkle you sew over becomes a permanent wrinkle. Takes two minutes, saves a lot of regret.
Mark your placement. Don’t eyeball it. Use a ruler and chalk to mark exactly where the patch goes. For a jacket chest patch, a standard reference point is 3 to 4 inches (7.5–10cm) below the shoulder seam and 1 inch (2.5cm) from the center front. For symmetrical pairs — two sleeve patches, for example — measure from the same fixed center point on both sides. Pin the patch in place and try the garment on before you commit.
Secure the patch temporarily. You have a few solid options:
- Straight pins inserted perpendicular to the patch edge every inch (2.5cm)
- A light coat of fabric glue stick on the patch back — it’s water-soluble and washes out completely
- Double-sided basting tape along the patch edges, especially useful on thick or slippery fabrics
- For iron-on patches: press with a medium-hot iron (300–350°F / 150–175°C) for 10 to 15 seconds with firm downward pressure; don’t slide the iron; let it cool before handling
One practical tip: photograph your placement with your phone before you start sewing. If a pin falls out mid-project, you’ll have a reference.
How to Sew On a Patch by Hand
Cut about 18 to 24 inches (45–60cm) of thread — longer than that and it’ll tangle before you finish. Form a quilter’s knot by wrapping the thread around your index finger, rolling it off with your thumb, and pulling tight. Running the thread across a block of beeswax before you start reduces tangling and helps it glide through thick layers.
Whip stitch is the workhorse — fast, strong, works on any patch type:
- Start from the inside of the garment so your knot is hidden between the layers.
- Push the needle up through the base fabric and catch the very edge of the patch.
- Bring the thread over the patch edge and insert the needle from the underside again, about ⅛ to ¼ inch (3–6mm) from your first stitch.
- Keep each stitch ⅛ inch (3mm) from the patch edge. Maintain even tension — firm enough to hold, but not so tight the fabric dimples.
- Every 3 to 4 inches (7.5–10cm), tug gently on the thread to even out tension before continuing. This prevents gradual tightening that causes puckering on long perimeters.
Blanket stitch is the decorative option — it creates a looped edge that’s visible and intentional-looking, great for felt patches. Work the same spacing as the whip stitch, but before pulling each stitch through, pass the needle through the loop of thread to create the characteristic locked edge.
At corners, take 2 to 3 stitches through the same corner hole — corners are the highest-stress point on any patch. On curves, shorten your spacing to about 1/16 inch (1.5mm) so the stitches follow the curve without gaps.
To finish, make a small backstitch, loop through it twice, pull tight, and repeat. Trim the tail to ¼ inch (6mm) and push it between the layers with your needle tip.
How to Sew On a Patch by Machine
Set your machine to a straight stitch at 2.0 to 2.5mm length, or a zigzag at 2.0mm width by 1.5 to 2.0mm length. Use a standard presser foot for straight stitch; an open-toe embroidery foot for zigzag — the open toe lets you actually see the patch edge while you sew, which matters more than you’d think. Test your settings on a scrap of the same fabric weight before touching the garment.
Sewing the perimeter:
- Start at the middle of one straight side — never at a corner, which is the most stress-prone spot.
- Backstitch 3 to 4 stitches to lock the thread.
- Sew with the needle falling ⅛ inch (3mm) from the patch edge. Use the presser foot edge as a guide, or apply a strip of painter’s tape to the machine bed as a visual reference on dark fabrics.
- Sew around the full perimeter, overlapping your starting point by ½ inch (1.3cm).
- Backstitch 3 to 4 stitches to finish, then trim threads close.
Pivot turns at corners: Stop with the needle down in the fabric, lift the presser foot, rotate the fabric 90 degrees, lower the foot, and continue. The needle-down part is what keeps your corner sharp instead of rounded.
For a satin stitch border (factory-finish look): set your zigzag to 3.0 to 4.0mm width and 0.3 to 0.5mm length. Sew slowly. The outside swing of the needle should just clear the patch edge. If you’re going over a thick embroidered patch, reduce your presser foot pressure slightly — standard pressure can cause the machine to climb over the raised surface and produce uneven stitches.
For extra durability on workwear or kids’ clothing, add a second line of straight stitching ¼ inch (6mm) inside the first. This double border distributes stress across a wider area and significantly extends the life of the patch.
Common Mistakes to Avoid
- Not pre-washing — the single biggest cause of puckering after the first wash
- Relying on iron-on adhesive alone — it will peel; always stitch
- Starting at a corner — your locking stitches end up at the most vulnerable point
- Pulling hand-sewing thread too tight — the fabric around the patch will gather and pucker
- Sewing through the garment lining — slip a piece of cardboard between the layers before you start; this is an easy mistake and a frustrating one to fix
- Skipping the final press — a light press with a damp pressing cloth flattens the stitches and makes the whole thing look deliberate
Pro Tips for Curved Surfaces and Tricky Placements
For sleeves and knees, stuff the area with a rolled towel or use a tailor’s ham before pinning. This gives you a firm, curved surface that mimics how the garment sits when worn, which prevents the patch from pulling or distorting once it’s attached.
For symmetrical placements, hold the garment up to a window — you can see through most fabrics well enough to align patches to seams or center lines.
On lightweight or stretchy garments, hand-sewing can distort the fabric if it’s not stabilized. A 4 to 6 inch embroidery hoop around the patch area keeps the fabric taut while you work, and your stitches will be noticeably more even.
For iron-on patches on textured fabrics like canvas or fleece, warm the patch backing with a hair dryer for 10 to 15 seconds before pressing with the iron. It softens the thermoplastic adhesive and dramatically improves adhesion.
Frequently Asked Questions
Do I need to sew an iron-on patch, or is the adhesive enough?
The adhesive alone won’t hold long-term — expect peeling after 5 to 10 washes, faster with dryer heat. For anything you wear and launder regularly, always reinforce with stitching around the perimeter. The iron-on step is a positioning tool, not a permanent attachment method.
What’s the best hand stitch for sewing on a patch?
The whip stitch is the most practical — fast, strong, works on any patch type. If you want a more decorative finish, the blanket stitch creates a visible looped edge that looks intentional, especially on felt. The difference is mostly aesthetic; both hold well.
How do I stop a patch from puckering on denim?
Pre-wash both the denim and the patch before attaching — this is the main culprit. Use a denim needle (90/14 or 100/16 on the machine), keep thread tension even, and don’t pull your hand-sewing thread too tight. If you’re machine sewing, slow down and let the feed dogs do the work.
Can I sew a patch onto a lined garment?
Yes, but be deliberate about it. Open the garment as much as possible and slip a piece of cardboard between the outer fabric and the lining before you start. Without it, you’ll almost certainly catch the lining in your stitches — and unpicking that without leaving marks is genuinely difficult.
How do I keep a patch from falling off after washing?
Three things: pre-wash before attaching, stitch around the full perimeter, and backstitch at the start and end of any machine stitching. For high-stress areas like knees and elbows, add that second pass of straight stitching ¼ inch (6mm) inside the first. A final press with a damp cloth after sewing helps set the stitches too.