Quick Answer: Those little metal or plastic pieces on bra straps and cami tops are called bra strap sliders (or adjusters), O-rings, and D-rings — and depending on what the hardware actually does, you might also be looking at a camisole clip, a front-close clasp, or a side-release buckle. There’s no single universal name for all of them, which is exactly why they’re so hard to search for. Read on to figure out exactly which piece you need and where to find it.
If you’ve ever typed “what are these clips called? I want to make this top but can’t find them anywhere” into a search bar, you already know the frustration: vague results, fabric stores with half-empty notions walls, Amazon listings that tell you nothing useful. The hardware you’re looking for falls under the umbrella of lingerie hardware or bra notions — and once you know those terms, a whole world of suppliers opens up.
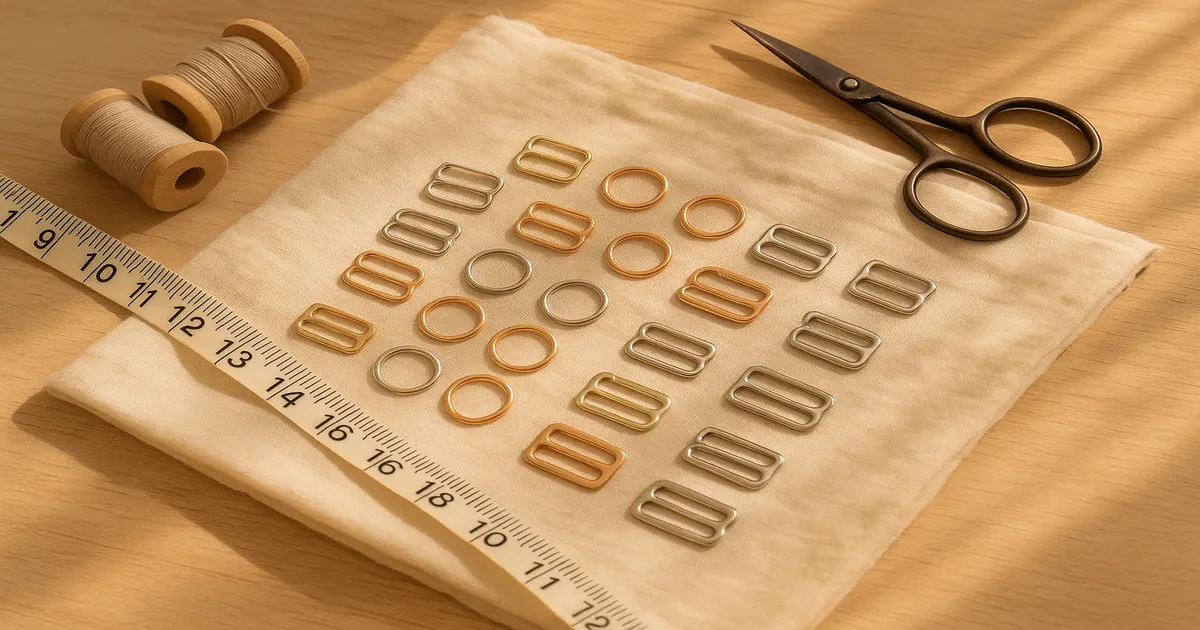
What Are Those Clips Called? The Main Types at a Glance
- Bra strap sliders (adjusters) — the rectangular piece that lets you shorten or lengthen a strap
- O-rings and D-rings — simple loops that anchor a strap or redirect its angle
- Camisole clips / fold-over clips — a spring-loaded metal or plastic clip that clamps onto a thin strap
- Front-close clasps — center-front opening hardware on sports bras and swimwear
- Side-release buckles — push-button plastic buckles borrowed from outdoor gear
- Suspender / garter clips — rubber-tipped clamps that grip stocking tops
- Bra hooks and eyes — the flat back-closure tape on most conventional bras
Why There’s No Single Universal Name
Retailers call the same piece a “slider,” an “adjuster,” a “length adjuster,” a “strap finding,” or a “lingerie hardware notion” — often interchangeably, often within the same website. General fabric stores like JoAnn and Hobby Lobby stock maybe two sizes of nickel sliders if you’re lucky; they’re just not set up for intimate apparel construction. The search terms that actually unlock inventory are: lingerie hardware, bra notions, intimate apparel findings, and swimwear hardware.
The Complete Guide to Lingerie Hardware Types
Bra Strap Sliders (Adjusters)
This is the piece most people are trying to name. A slider is a small rectangular frame — usually metal, sometimes nylon — with one or two crossbars inside it. You thread elastic through in a figure-8 path, and friction against the center bar holds the adjustment. Pull one end, the strap shortens. It’s the same basic mechanism used on military webbing and backpack straps, just miniaturized.
The single-bar slider (one crossbar) is standard for most bra and cami straps. The two-bar slider (two crossbars, true figure-8 threading) grips more aggressively and shows up on swimwear and heavier athletic straps where a single bar would slip under tension.
O-Rings and D-Rings
An O-ring is just a loop — no bars, no moving parts. It anchors one end of a strap to the bra cup or back band and changes the angle the strap runs. D-rings do the same job but with a flat edge, which is especially useful on halter tops where you want the strap to fold cleanly against the fabric. You’ll almost always see an O-ring or D-ring paired with a slider: the ring is fixed at one end, the slider sits on the adjustable section.
Camisole Clips and Fold-Over Clips
These are the pinching clips — a small metal or plastic piece with a spring mechanism that clamps onto a thin strap. They’re sized for narrow straps, typically 3/8 inch (10mm) to 1/2 inch (12mm), and they became popular in the 1990s alongside the cami-over-tee layering trend. They’re also standard on nursing bras, where one-handed release is the whole point.
Front-Close Clasps and Side-Release Buckles
Front-close clasps are the hardware that lets a sports bra or swimsuit top open at center front — usually a hook-and-bar system, or a magnetic closure on higher-end versions. Side-release buckles are the push-button plastic pieces you recognize from backpack straps; swimwear designers borrowed them from outdoor gear because they’re lightweight, chlorine-resistant, and easy to operate with wet hands.
Suspender and Garter Clips
These are the rubber-tipped metal clamps on a short elastic tab that grip the welt of a stocking. If you’re making a garter belt or a suspender skirt, this is what you need. They’re sold as “suspender clips,” “stocking clips,” or “garter clips” depending on the supplier — same product, three different names.
Bra Hooks and Eyes
The back closure system — either hook-and-eye tape (stretchy woven tape with multiple rows of hooks and bars) or individual hooks and eyes sewn to a fabric band. These are more widely available than other lingerie hardware, but quality varies enormously. Cheap hook-and-eye tape bends out of shape fast. It’s worth buying from a specialist supplier.
How to Identify Exactly Which Clip You Need
Step 1: Classify the Function
What does the hardware actually do?
- Adjusts strap length → slider/adjuster
- Anchors or redirects a strap → O-ring or D-ring
- Opens and closes the garment → front-close clasp, side-release buckle, or hook-and-eye
- Pinches onto fabric → camisole clip, suspender clip, or fold-over clip
Step 2: Measure Your Strap Width
Hardware is sized by its inner channel width, not the outer frame. A 1/2-inch (12mm) slider on a 3/8-inch (10mm) strap will slide right through and hold nothing. Measure your elastic or strap fabric, then match exactly.
| Strap Type | Width | Hardware Size |
|---|---|---|
| Spaghetti strap | 3/8 inch (10mm) | 3/8 inch (10mm) |
| Standard bra strap | 1/2 inch (12mm) | 1/2 inch (12mm) |
| Wider bra/swimwear | 5/8–3/4 inch (15–19mm) | 5/8 or 3/4 inch |
| Halter/athletic | 1 inch (25mm) | 1 inch (25mm) |
Before you buy, thread a scrap of your actual elastic through the hardware. It takes 30 seconds and saves a frustrating return.
Step 3: Choose Material and Finish
- Nickel-plated steel — shiny silver, most common, not suitable for nickel allergies or swimwear
- Gold-plated steel — warm tone, same considerations as nickel
- Rhodium or palladium plated — hypoallergenic, tarnish-resistant, worth the extra cost for sensitive skin
- Matte black coated metal — very on-trend in fashion lingerie right now
- Nylon/plastic — chlorine-resistant, essential for swimwear
- Brass — heavier, vintage-looking, the standard for corsetry
How to Attach a Bra Strap Slider and Ring
What You’ll Need
- 1/2-inch (12mm) plush-back bra strap elastic, approximately 24 inches (61cm) per strap
- One 1/2-inch (12mm) single-bar slider
- One 1/2-inch (12mm) O-ring or D-ring
- Wooly nylon or polyester thread
- Zipper foot
Step 1: Thread the Elastic Through the Slider Correctly
Feed one end of the elastic up through the bottom of the slider, over the center bar, and back down through the other channel. This is the figure-8 path — threading it any other way (just looping around the outside, for example) means the slider won’t grip. Leave a 1-inch (2.5cm) tail extending past the slider.
Step 2: Bartack the Tail
Fold that 1-inch tail back on itself. Stitch across it three times at 1.5–2mm stitch length for straight stitching, or switch to a 3–4mm zigzag if you’re stitching across the elastic itself to preserve stretch. A single straight line will eventually fail under the constant tension of a bra strap — don’t skip the extra passes.
Step 3: Attach the Ring to the Other End
Pass the long free end of the elastic through the O-ring or D-ring. Fold back a 1/2-inch (12mm) tail and stitch to secure. This end connects to the bra cup or back band.
Step 4: Check the Adjustment Range
The working path runs: bra cup → through ring → back through slider → to back band. The slider sits on the back section; pulling the back end of the elastic shortens the strap. Before final stitching, fit the strap on a dress form or try it on — a properly adjusted strap should allow two fingers to slip underneath comfortably.
Step 5: Finish with a Box-X Stitch
All attachment points need a box-X stitch: stitch a rectangle approximately 3/8 inch × 1/4 inch (10mm × 6mm), then stitch diagonally corner to corner twice. Repeat the rectangle 2–3 times total. This is what separates a strap that lasts from one that pulls apart after six months of wear.
Where to Buy Bra Strap Hardware
General craft stores are genuinely not the right place for this. Here’s where to actually shop:
- Bra-makers Supply (bramakerssupply.com) — the most comprehensive North American source; stocks everything from basic nickel sliders to specialty corsetry hardware
- Merckwaerdigh (merckwaerdigh.com) — European supplier with excellent hypoallergenic options
- Tailor Made Shop — good for fashion-forward finishes like matte black and rose gold
- Pacific Trimming (New York) — trade supplier with retail access; great for buying in person or in bulk
- Etsy lingerie notions shops — ideal for small quantities, unusual finishes, and curated starter packs
Search Terms That Actually Return Results
Use: lingerie hardware, bra notions, intimate apparel findings, strap hardware, swimwear hardware. Searching “bra clips” or “strap clips” mostly returns clip-on bra strap converters — a completely different product.
Buying on Amazon: What to Watch Out For
Always check the inner channel width in the listing description, not just the title. A listing called “1/2 inch bra sliders” might have a 10mm (3/8 inch) inner channel because the seller is measuring the outer frame. Read the fine print. Plating quality is also inconsistent; cheap hardware can start flaking after just a few washes.
Buy in bulk packs of 25–50 pieces even for a single project. Hardware is cheap per unit in bulk, and you’ll use them again.
Needles, Thread, and Elastic: Quick Reference
Elastic: Use plush-back bra strap elastic for bras and camis (soft side against skin). For swimwear, you need chlorine-resistant swimwear elastic specifically — regular bra elastic degrades fast in a pool. For decorative cami straps, fold-over elastic (FOE) at 5/8 inch (15mm) wide folds to a tidy 5/16 inch (8mm) and comes in hundreds of colors.
Thread: Wooly nylon (texturized nylon) is the right choice for lingerie and swimwear seams — it has built-in stretch and won’t break down with washing the way cotton does. For hardware attachment points where you’re sewing through multiple layers of non-stretch elastic, regular polyester all-purpose thread works fine.
Needles: Use a stretch needle (75/11) for sewing through elastic. For woven cami fabrics, switch to a Microtex 70/10 or 80/12. A zipper foot is essential near hardware — it lets you stitch close without the foot catching on metal. A walking foot helps when feeding multiple layers of elastic evenly.
Common Mistakes to Avoid
Wrong size hardware. Measure the inner channel, not the outer frame. A 1/2-inch strap through a slider with a 5/8-inch inner channel will never hold adjustment.
Threading the slider backward. The elastic must cross over the center bar inside the slider, not loop around the outside of the frame. If you thread it wrong, the slider moves freely in both directions and does nothing.
Skipping the bartack. One line of straight stitching across a strap tail isn’t enough. The constant tension and movement on a bra strap will eventually pull it apart. Bartack it, box-stitch it, stitch it three times — just do more than one pass.
Using nickel hardware on swimwear. Nickel-plated steel and chlorinated water are a bad combination. The hardware will rust, and the rust will stain your fabric. For anything that gets wet regularly, use nylon or rhodium-plated metal. This isn’t a maybe — it’s a when.
Not fitting before final stitching. Set the strap length on an actual body before you sew that last bartack. A box-X stitch is not easy to undo.
Pro Tips for Better Results
The pinch test. After attaching a slider, grip the strap tail and tug firmly. Your bartack should withstand a 5–10 lb (2.2–4.5kg) pull without the elastic slipping through. If it slips, add more passes.
Spray starch for threading tight sliders. Spray a little starch on the end of your elastic and let it dry for a minute before threading. It temporarily stiffens the tip so it doesn’t fold or collapse as you push it through a narrow channel. A bodkin is also much better than a safety pin here — safety pins catch on everything.
Match hardware to fabric, not thread. Thread disappears into the seam; the hardware is what the eye sees. Warm-toned fabrics look better with gold hardware; cool-toned or white fabrics look cleaner with silver or rhodium. Matte black reads as intentional and modern on almost any color.
Test-wash before you commit. Tape a sample of your chosen hardware to a fabric scrap and run it through two full wash cycles. This reveals cheap plating that tarnishes or flakes — far better to find out now than after a 10-hour project.
Skip the hardware entirely if you’re a beginner. Fold-over elastic straps with no hardware are non-adjustable but completely functional and much easier to construct. Ribbon ties work beautifully on vintage-style cami tops. Pre-made bra straps sold by the pair at lingerie suppliers come already assembled — you just cut to length and attach. There’s a real skill progression here, and there’s no shame in starting simple.
Frequently Asked Questions
What is the correct name for the sliding piece on a bra strap? It’s called a bra strap slider or bra strap adjuster. You may also see it listed as a “strap finding” or “length adjuster” depending on the supplier. All the same thing.
Can I use regular craft store hardware for bra straps? For a basic cami or bralette, yes — if you can find the right size. But specialist lingerie suppliers stock far better quality, a wider range of sizes and finishes, and hardware that’s actually designed for the tension a bra strap puts on it. It’s worth ordering online.
What size slider do I need for a standard bra strap? Most standard bra straps use 1/2-inch (12mm) elastic, so you need a 1/2-inch (12mm) slider — measured at the inner channel. Always confirm by threading a scrap of your elastic through before buying in quantity.
Why does my slider keep slipping and not holding the adjustment? Almost always one of two problems: the elastic is threaded incorrectly (it needs to cross over the center bar in a figure-8, not just loop around the frame), or the slider is too large for the elastic width. Check both before assuming the hardware is defective.
Is there a difference between an O-ring and a D-ring, and does it matter? Yes, and it does matter. An O-ring is a full circle — it distributes tension evenly in all directions and works well when a strap can approach from any angle. A D-ring has a flat edge, which keeps the strap lying flat and prevents it from twisting. Use D-rings on halter tops and anywhere you want a clean, flat fold; use O-rings where the strap angle is more variable.