Quick Answer: Mark your button placement, anchor your thread with a small stitch, then sew 6–8 passes through the holes using a toothpick as a spacer to build a thread shank. Remove the spacer, wrap the thread column 6–8 times to form the shank, then finish with locking stitches on the wrong side. The thread shank is the step most people skip — and it’s exactly why buttons fall off.
Knowing how to sew a button properly is one of those skills that sounds simple until you’ve sewn the same button back on three times and watched it pop off again. The problem is almost never the sewing itself — it’s skipping the thread shank, using too few passes, or finishing sloppily on the wrong side. This guide covers flat sew-through buttons (2-hole and 4-hole), shank buttons, and a quick note on machine sewing, so you’ve got the full picture.
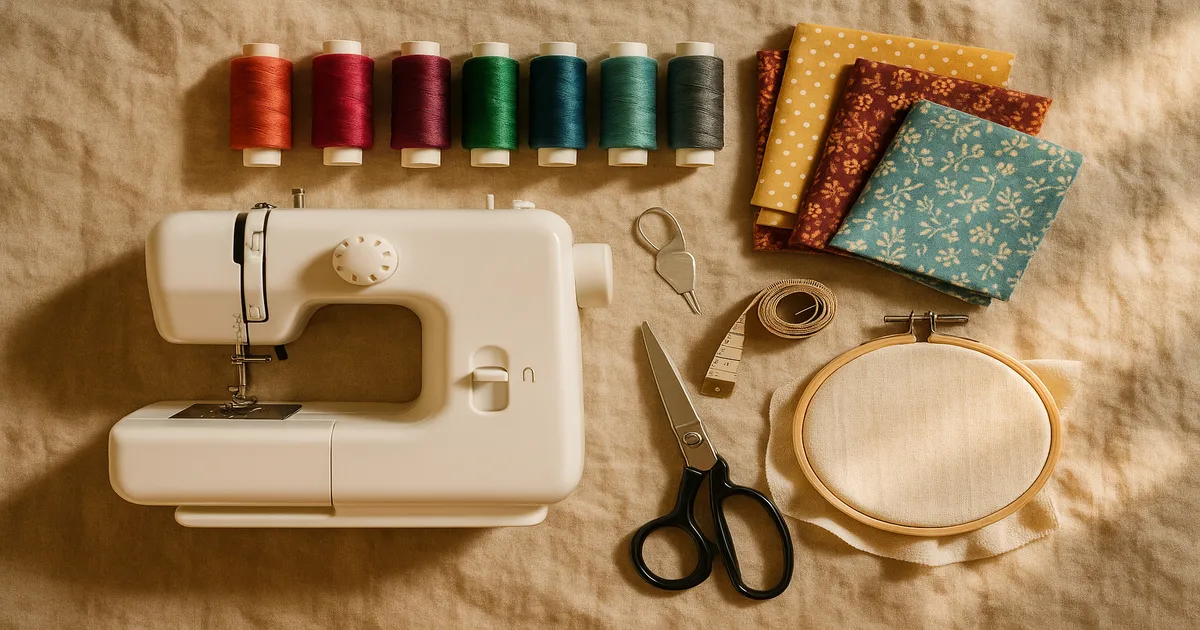
What You Need Before You Sew a Button
Choosing the Right Thread
The thread you use matters more than most tutorials admit:
- All-purpose polyester (50 wt) — the right choice for most garments; its slight stretch resists snapping under stress
- Cotton (50 wt) — good for natural-fiber garments like linen or cotton shirts; slightly less strong than poly
- Button/carpet thread (20–30 wt) — for coats, heavy denim, or upholstery; use a single strand rather than doubled since it’s already thick (Gutermann Tera)
- Silk thread — the traditional tailoring choice for fine wool suits; self-lubricating and nearly tangle-free
Avoid bargain-bin thread that feels rough or snaps when you tug it. And never use metallic thread for a functional button — it looks great until it doesn’t.
Selecting the Right Needle
For standard doubled all-purpose thread, a size 7 or 8 hand-sewing needle works well. Drop to a size 5 or 6 for heavier button/carpet thread on coats or thick fabrics. The needle should pass through the button holes without forcing — if you’re muscling it through, the needle is too thick and you’re going to shred the thread.
Buttons: Types and Sizing
There are four types you’ll run into most often:
- 2-hole flat buttons — common on shirts and lightweight garments
- 4-hole flat buttons — more versatile and stronger; the most common overall
- Shank buttons — have a built-in metal or plastic loop on the back; ideal for heavy fabrics
- Covered and toggle buttons — decorative variations attached using the same basic principles
Button sizing follows the ligne system (1 ligne = 0.635 mm). A standard shirt button runs 16–20 ligne (about 10–12 mm); a coat button is typically 32–36 ligne (about 20–23 mm). Useful to know when you’re replacing a button and need to match the size.
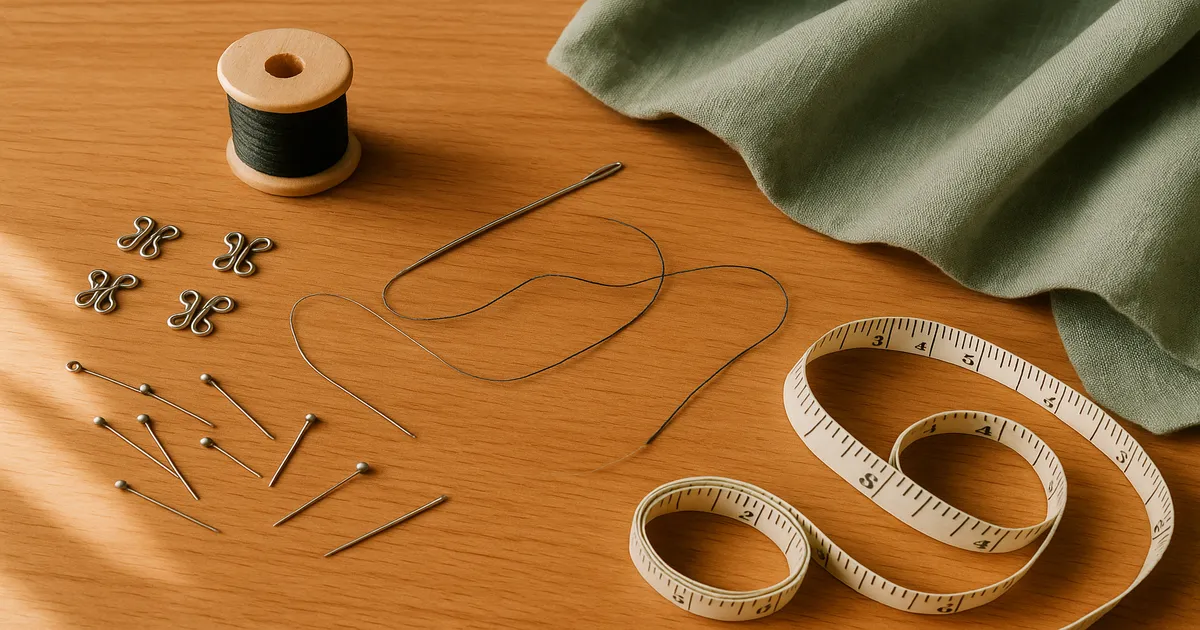
Other Tools Worth Having
- Tailor’s chalk or a water-soluble marker for placement
- Toothpick or matchstick as a shank spacer
- A beeswax block for conditioning thread (Collins)
- Thimble — leather ones are more comfortable than metal if you’re not used to them
- Seam ripper for removing old buttons cleanly
- Small scissors or thread snips
- Needle-nose pliers for heavy fabrics like denim or canvas
How to Sew a Flat (Sew-Through) Button
Step 1: Mark Placement and Prepare Your Thread
Use a water-soluble marker or tailor’s chalk to mark the exact button center. Cut your thread to 18–24 inches (45–60 cm) — longer and it’ll tangle constantly. Thread your needle, double the thread, and tie a quilter’s knot at the cut ends: wrap the thread once around your index finger, roll it off with your thumb, and pull tight.
Step 2: Anchor the Thread
Push the needle up from the wrong side at your placement mark and pull through until the knot catches. Before placing the button, take one small anchor stitch — about 1/8 inch (3 mm) — right on the mark. This gives you a redundant starting point so that if one thread breaks later, the whole button doesn’t come off in a single pull.
Step 3: Position the Button and Set Your Spacer
Place the button on your mark. Lay a toothpick or matchstick horizontally across the top of the button, parallel to the buttonhole direction — horizontal on shirts, vertical on waistbands. This spacer is what creates your thread shank automatically as you sew. Don’t skip it.
Step 4: Sew Through the Holes
For a 2-hole button: Bring the needle up through one hole and down through the other. Repeat 6–8 times, keeping the stitches parallel. Don’t cross them on the face of the button.
For a 4-hole button: Think of the holes as a clock face — 12, 3, 6, and 9 o’clock. Sew 12→6 six times, then 9→3 six times for a parallel pattern. This is structurally the strongest arrangement because it creates two independent thread columns. The X pattern looks nice but distributes stress less evenly — skip it on anything functional.
Step 5: Form the Thread Shank
After your last pass, bring the needle out between the button and the fabric — not through a hole. Remove the toothpick. The button will be sitting up on a loose bed of thread. Wrap the thread firmly around that column 6–8 times, working from the fabric up toward the button.
Shank length should match your fabric weight:
- Shirts and blouses: 1/8 inch (3 mm)
- Trousers and dresses: 1/4 inch (6 mm)
- Coats and jackets: 3/8–1/2 inch (9–12 mm)
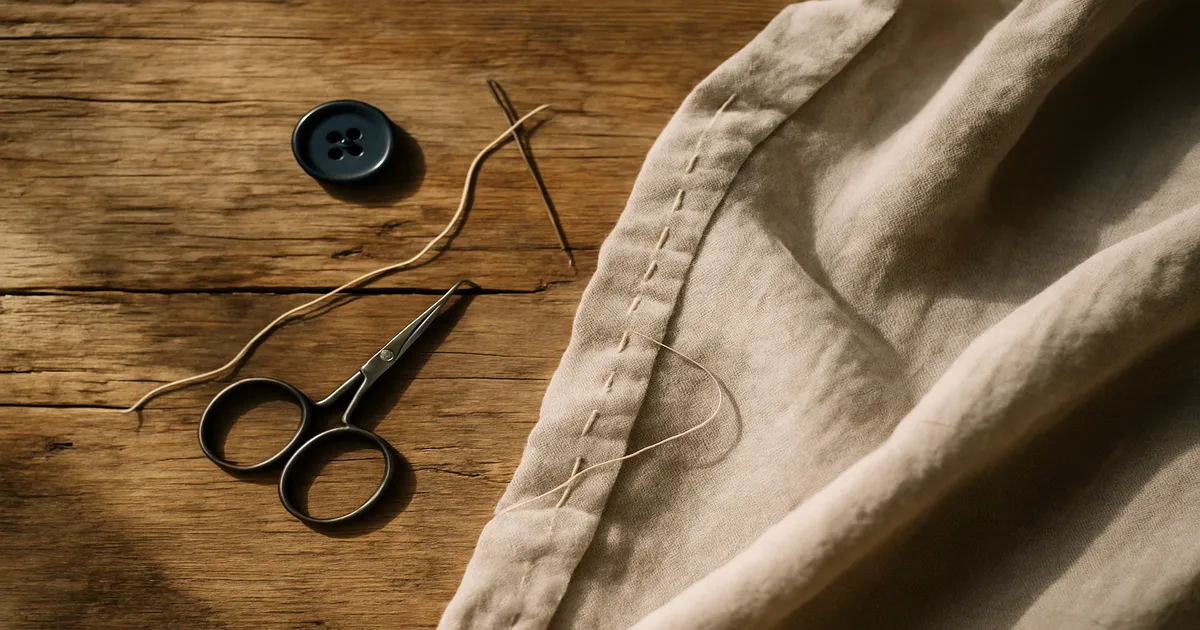
Step 6: Finish on the Wrong Side
Push the needle back through to the wrong side. Take 2–3 small locking stitches through the fabric only — not back up through the button. Whipstitch around the thread cluster 2–3 times, then finish with a surgeon’s knot or pass the needle under the last loop before pulling tight. Trim to about 1/4 inch (6 mm). Don’t trim flush to the knot — that’s how knots unravel.
How to Sew a Shank Button
Shank buttons have a built-in loop on the back, so you don’t need to create a thread shank — the loop handles the gap. Mark your placement and anchor your thread exactly as above.
Pass the needle through the shank loop and down through the fabric, then back up and through the loop again. Repeat 8–10 times. One key detail: orient the shank loop parallel to the buttonhole so the button can pivot naturally when fastened. If the loop runs perpendicular, the button will torque under stress and the stitching will fail faster.
No spacer needed. Finish on the wrong side with the same locking stitches and surgeon’s knot. Shank buttons are the better choice for heavy fabrics — coats, thick wool, heavy denim — where a thread shank would need to be so long it becomes impractical.
How to Sew a Button by Machine
Most modern sewing machines can sew buttons with a button foot — a flat, open-toed foot with a rubber grip that holds the button steady. Set your machine to zigzag, drop the stitch length to 0, and adjust the stitch width until the needle swings cleanly over both holes (test this by turning the handwheel by hand first — one wrong setting and you’ll snap a needle). Drop or cover the feed dogs so the fabric stays put. Run 8–10 zigzag cycles, then tie off.
Honest take: machine-sewn buttons are fast and fine for lightweight or decorative buttons. But they don’t produce a thread shank, and the tie-off isn’t as secure as a hand-finished knot. I wouldn’t use this method on a waistband, coat front, or cuff — anything that takes real daily stress. For those, sew by hand.
Common Mistakes When Sewing a Button
Skipping the thread shank. Without a shank, the button sits flat against the fabric. When you fasten it, the buttonhole band has nowhere to go and strains constantly against the button — which tears it free or wrecks the buttonhole over time. Even on thin shirts, a 1/8-inch (3 mm) shank makes a real difference. Use the toothpick. Every time.
Too few passes. Fewer than 6 passes and you’ve got a button that’s decorative at best. For daily-use buttons on waistbands, cuffs, or coat fronts, aim for 8–10. It takes an extra 30 seconds.
Eyeballing the placement. This is how you end up with a shirt that pulls sideways. The accurate method: close the garment, pin it shut, then push a pin straight through the center of each buttonhole to mark the fabric underneath. Open it up — those pin marks show you exactly where each button belongs.
Sloppy finishing on the wrong side. A single loose knot will work free, especially with polyester thread. Always do 2–3 locking stitches before knotting, and whipstitch around the thread cluster for insurance.
Wrong thread weight. Fine 50 wt thread on a heavy coat button will eventually snap. Heavy carpet thread on a delicate blouse will pucker the fabric and look terrible. Match the thread weight to the job.
Pro Tips for a Button That Actually Stays
Use a reinforcement button on the wrong side. This is standard tailoring practice and almost never mentioned in basic tutorials. On any garment that takes stress — coats, jackets, kids’ clothing — sew a small flat button (about 3/8 inch / 10 mm) on the wrong side at the same time as the main button. Your thread passes through both: up through the reinforcement button, through the fabric, through the main button, back down. The pull force distributes across a much larger area, making it nearly impossible for the button to tear through.
Wax your thread. Run it across a beeswax block, then press briefly with a warm iron to set the wax into the fiber. This eliminates most tangling, makes the thread slightly stronger, and helps it pull through tight holes more smoothly. A block costs a few dollars and lasts years.
Match your spacer to your fabric weight. A round toothpick gives about 1/8 inch (3 mm) — right for shirts. A matchstick gives roughly 3/16 inch (5 mm) for medium-weight fabrics. A large tapestry needle or a pencil gets you 1/4 inch (6 mm) or more for coats. Keep a few options in your kit.
Pre-treat replacement buttons. Before sewing on a new plastic button, dab a little clear nail polish or Fray Check over the holes and let it dry. This seals any micro-cracks in the plastic that would otherwise act like a tiny blade against your thread. Cheap buttons especially benefit from this.
Frequently Asked Questions
How many times should you sew through a button hole to make it secure?
At minimum, 6 passes for a light-use button. For anything that takes daily stress — waistbands, cuffs, coat fronts — do 8–10. Couture standards call for 10, but 8 is solid for most home sewing.
What is a thread shank and why does it matter?
A thread shank is the small column of wrapped thread between the bottom of the button and the fabric surface. It creates space for the buttonhole band to sit when the garment is fastened, which takes the strain off the stitching. Without it, buttons pop off much faster — especially on heavier fabrics where the buttonhole band has real thickness.
How do you sew a button on thick fabric like a coat or denim?
Use heavy-duty button or carpet thread (single strand, not doubled), a size 5 or 6 needle, and a spacer that gives you at least 3/8 inch (9 mm) of shank. On very heavy fabric, use a thimble on your pushing finger and needle-nose pliers to grip and pull the needle through from the other side. A reinforcement button on the wrong side is strongly recommended.
How do you stop a button from falling off again after re-sewing it?
Three things: enough passes (at least 8), a proper thread shank, and a secure finish on the wrong side with locking stitches and a surgeon’s knot. If the fabric around the old button is worn or frayed, a reinforcement button on the wrong side will distribute the load and give the thread something solid to grip.
Can you sew a button on with a sewing machine?
Yes — with a button foot and zigzag set to zero feed. It’s faster than hand sewing, but machine-sewn buttons don’t have a proper thread shank and the finish isn’t as secure. Fine for lightweight or decorative buttons; I wouldn’t trust it on a coat or a waistband.