Quick Answer: Put the sweater on, bend your arm to 90 degrees, and mark your elbow center — then place your patch center about 1 inch above that point. Cut symmetrical patches from leather, wool felt, or woven fabric, slide a cardboard insert into the sleeve so you don’t sew it shut, and hand-sew the patch in place with a slip stitch or blanket stitch. First attempt takes 1–2 hours; you’ll get it down to 45 minutes once you’ve done it once.
Learning how to sew elbow patches on a sweater is one of those skills that looks more complicated than it is. The stitching itself is straightforward. What trips people up is placement — most tutorials have you mark the position with the sweater lying flat, which gives you completely wrong results — and managing the tubular sleeve without sewing it shut. Nail those two things and the rest is just sewing.
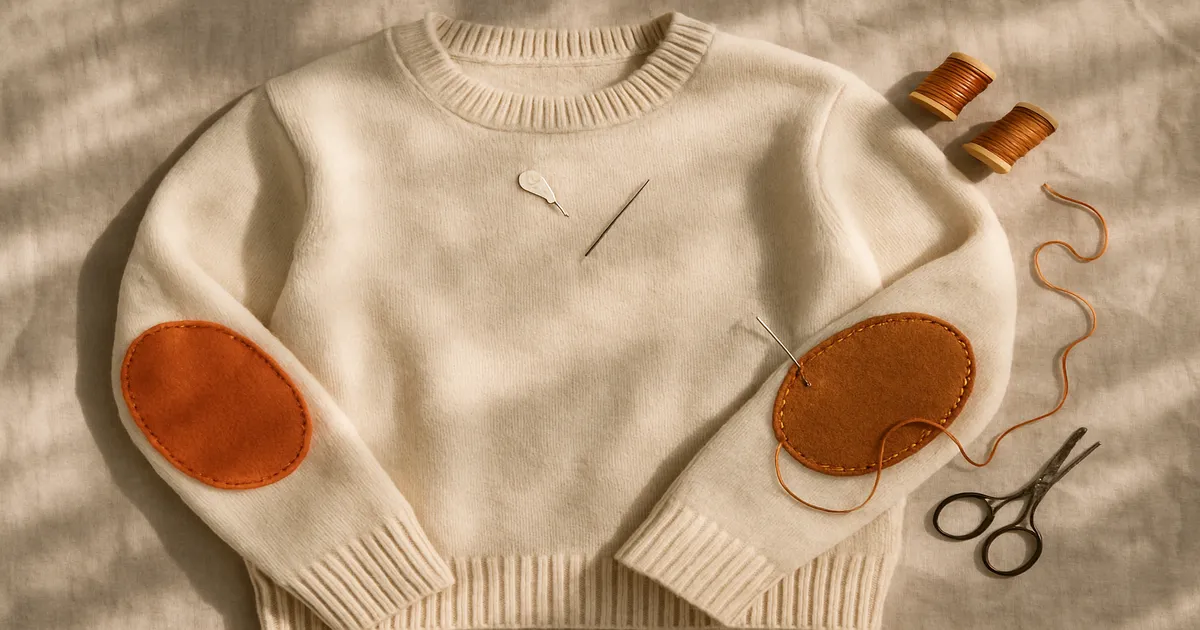
What You Need
- Patch fabric — leather, wool felt, suede, tweed, corduroy, or denim
- Thread — wool thread for invisible hand-sewing; pearl cotton No. 8 or embroidery floss for decorative blanket stitch; waxed linen for leather
- Needle — crewel size 7–8 for fabric patches; glover’s needle for leather; tapestry size 20–22 for pearl cotton through knit
- Fabric marker or tailor’s chalk
- Sleeve insert — a cardboard tube, sleeve board, or rolled-up magazine
Expect 1–2 hours for your first sweater, mostly spent on prep and positioning. Once you have a reusable template cut and know where your elbow sits, you can do it in 45 minutes.
Best Materials for Elbow Patches
Patch Fabric
Your fabric choice affects edge prep, needle selection, and how the patch wears over time.
- Genuine leather (2–3oz veg-tan) — most durable; develops a patina; doesn’t fray; needs a glover’s needle and waxed thread
- Suede (2–3oz) — softer than full-grain; same sewing approach as leather
- Faux/vegan leather — easier to work with; no special needle needed for thin versions; doesn’t breathe
- 100% wool felt (3mm / ⅛-inch thick) — my top pick for beginners; no fraying, no edge finishing, cuts cleanly, and looks great on wool sweaters (National Nonwovens WoolFelt)
- Harris Tweed or wool suiting — traditional and handsome; requires edge finishing
- Corduroy (11-wale) or denim (10–12oz) — casual and durable; both need edge finishing
Don’t use acrylic craft felt. It pills, it stretches, and it looks cheap. Wool felt costs a bit more and is worth every penny. Also avoid anything very stiff or heavy — a rigid patch won’t flex with the sweater and will cause the surrounding knit to distort and eventually pill.
Thread and Needles
For leather, use waxed linen thread (0.35–0.45mm). If yours isn’t pre-waxed, run it across a block of beeswax before you start. For a decorative blanket stitch, pearl cotton No. 8 is ideal — great sheen, hundreds of colors, and it sits beautifully on the surface. For invisible hand-sewing on wool, use wool thread; it blends into the knit texture in a way polyester simply doesn’t.
| Use | Needle |
|---|---|
| Fabric patches, hand-sewing | Crewel/Embroidery size 7–8 |
| Pearl cotton or wool thread through knit | Tapestry size 20–22 (blunt tip) |
| Leather patches, hand-sewing | Glover’s needle (triangular tip) |
| Machine-sewing onto knit sweater | Stretch needle 75/11 or 90/14 |
| Machine-sewing leather patches | Leather needle 90/14 or 100/16 |
You’ll also want a rotary cutter and self-healing mat, a pressing cloth, Fray Check for woven fabric edges, and double-sided basting tape if you’re working with leather.
How to Position and Cut Your Patches
Getting Placement Right
Here’s where most people go wrong: don’t mark the elbow with the sweater lying flat on a table. Put it on, bend your arm to roughly 90 degrees, and have someone mark the center of your elbow with a fabric-safe marker or a pin.
Then place the patch center 1 inch (2.5cm) above that mark. With your arm hanging straight, the patch will look slightly high — that’s intentional. When you bend your elbow, the sleeve fabric shifts upward, so a patch centered right on the elbow point will gap and pull. As a rough guide, the elbow center typically falls 10–13 inches (25–33cm) below the underarm seam along the back of the sleeve.
Patch Sizes and Shapes
- Women’s/slim fit: 4 × 5 inches (10 × 12.7cm)
- Standard men’s fit: 5 × 6 inches (12.7 × 15.2cm)
- Large/oversized sweater: 5.5 × 7 inches (14 × 17.8cm)
The classic shape is an oval. Rounded rectangles are slightly easier to sew and look just as authentic — I’d recommend them for a first attempt. Trace around a jar lid to get smooth curves, or use a French curve ruler. If you’re making patches for more than one sweater, cut a reusable template from cardboard or template plastic.
Add a ¼-inch (6mm) seam allowance all around if you’re turning under the edges. No seam allowance needed for leather or raw-edge applications.
Cutting Symmetrical Patches
Fold your patch material in half before cutting so both patches come out simultaneously. This guarantees mirror-image symmetry without any extra measuring. Mark the center of each patch with a small notch or chalk dot — you’ll use it to align the patch with your sweater mark.
How to Sew Elbow Patches on a Sweater: Step by Step
Preparing the Edges
- Turned-under edges (woven fabrics): Clip the curves every ½ inch (12mm), cutting to within 1/16 inch (1.5mm) of the fold line. Press under ¼ inch (6mm) with a hot iron and pressing cloth. On a knit sweater, use the finger-press technique instead — more on that below.
- Raw edges: Apply a thin bead of Fray Check around the perimeter and let it dry fully, 20–30 minutes. Don’t rush this.
- Leather or suede: Nothing needed. Cut cleanly with a rotary cutter and you’re done.
Insert Something in the Sleeve First
Before you sew a single stitch, slide a firm insert inside the sleeve — a sleeve board, a cardboard tube, a rolled magazine, or a strip of cereal box cut to sleeve width. This is non-negotiable. Without it, you will sew through both layers of the sleeve and close it shut. It happens to everyone who skips this step, usually about halfway through the first patch.
Position the patch over the marked elbow point, center mark aligned, and pin with 6–8 pins placed perpendicular to the edge. Lay both sleeves flat side by side and confirm the patches are symmetrical before you start sewing.
Slip Stitch: Clean and Nearly Invisible
The slip stitch hides the thread inside the folded patch edge — from the right side, you can barely see it.
- Start at the bottom center of the oval (least visible point).
- Insert your needle into the fold, travel ¼ inch (6mm) inside the fold, then exit.
- Catch just 2–3 threads of the sweater fabric — don’t go all the way through to the sleeve interior.
- Re-enter the fold and repeat. Aim for about 4 stitches per inch.
- On curves, shorten to 3/16 inch (5mm) to keep the edge smooth.
- Pull each stitch snug, not tight. If the sweater is gathering, ease up.
Keep thread lengths to 18 inches (45cm) maximum — longer and it starts to fray and tangle.
Blanket Stitch: Decorative and Deliberate
This is the go-to for visible mending. It works with raw or lightly fray-checked edges.
- Bring your needle up through the sweater fabric, ¼ inch (6mm) from the patch edge.
- Pass through the patch at the edge, loop the thread under the needle tip, then pull through.
- Space stitches 3/8 inch (9.5mm) apart and 3/8 inch (9.5mm) deep — this proportion looks balanced.
- Use contrasting thread for impact: cream on brown suede, rust on grey wool, navy on tan leather.
- Complete the circle and anchor with 3 small backstitches on the underside.
Finishing
Knot off on the wrong side with 2–3 small backstitches before your final knot — a single knot will eventually pull through knit fabric. Trim thread tails to ¼ inch (6mm).
Steam-press the finished patch from the right side with a pressing cloth. Never put an iron directly on leather, suede, or fine knitwear. Let everything cool before wearing.
Machine Sewing Elbow Patches
Machine sewing works well on stable-knit sweaters — sweatshirt-weight cotton-poly, ponte knit, tightly knit wool jersey. It’s not a good choice for fine merino, loosely knit wool, or anything with significant drape. I’d also skip machine-sewing leather patches onto delicate knitwear — a leather needle and feed dogs on fine knit is a reliable way to snag something you love.
Use a walking foot to prevent the knit from stretching as it feeds. Set a narrow zigzag at width 1.5–2.0mm, length 2.0–2.5mm, or use the triple/lightning bolt stretch stitch if your machine has one. Remove the accessory tray to expose the free arm, slide the sleeve over it, and sew slowly — stop with the needle down to pivot every ½ inch (12mm) on tight curves. Backstitch ½ inch (12mm) at start and end.
Common Mistakes to Avoid
- Marking with the sweater off your body — sleeves twist slightly in wear; always mark while wearing it
- Patch placed too low — mark with arm bent, then go 1 inch higher
- Skipping the sleeve insert — you will sew the sleeve shut; this is not recoverable without unpicking every stitch
- Pulling stitches too tight — causes permanent puckering in the knit
- Pins in leather — they leave permanent holes; use double-sided basting tape instead
- Acrylic craft felt — just don’t
- Not pre-washing woven fabrics — tweed, corduroy, and denim can shrink; wash and dry before cutting
- Single knot to finish — always use 2–3 backstitches first
Pro Tips
Free cardboard sleeve insert: A strip of cereal box cut to sleeve width works better than a rolled towel — it stays flat and doesn’t shift while you’re sewing.
Pre-punch leather for even stitches: Use a leather hole punch set to 3/16-inch (5mm) spacing and punch all the way around the patch perimeter before you pick up a needle. Every hole is pre-made and perfectly even, and the needle glides through without resistance. This one step makes leather patches look professionally done.
Finger-press instead of ironing on knit: Rather than pressing the turned-under edge with an iron (which can stretch and distort the knit underneath), use your fingernail to firmly crease the fold as you go — working 1–2 inches ahead of your needle. It’s surprisingly effective and much safer on fine knitwear.
Sew with the knit’s direction: On stockinette sweaters, the yarn forms visible V-shapes. Sew in the downward direction — with the point of the V — to reduce the chance of splitting the yarn. Small detail, noticeable difference.
Frequently Asked Questions
Where exactly should elbow patches be placed on a sweater?
Put the sweater on and bend your arm to 90 degrees. Mark the center of your elbow, then place the patch center 1 inch (2.5cm) above that point. This accounts for the sleeve fabric shifting upward when your arm bends. As a rough guide, the elbow center sits about 10–13 inches (25–33cm) below the underarm seam along the back of the sleeve.
What’s the best fabric for elbow patches on a sweater?
Wool felt (3mm thick) is the easiest starting point — no fraying, no edge finishing, and it pairs naturally with wool sweaters. Leather is the most durable and develops a nice patina, but requires a glover’s needle and waxed thread. Avoid acrylic craft felt; it pills and looks cheap within a few wears.
Can you sew elbow patches on a sweater by hand without a sewing machine?
Absolutely — hand-sewing is actually preferable for most knit sweaters. A slip stitch gives a nearly invisible finish; a blanket stitch gives a decorative one. Neither requires a machine, and hand-sewing gives you much better control on curved edges and stretchy fabric.
How do I keep from sewing the sleeve shut?
Slide a firm insert into the sleeve before you start — a sleeve board, a cardboard tube, or a strip cut from a cereal box all work. Sew through only the top layer of the sleeve. Check every few stitches that you haven’t caught the back layer.
Do elbow patches work on thin or worn sweaters?
Yes, and that’s actually one of the best uses for them. A patch sewn over a thinning area distributes stress across a wider surface and can extend the sweater’s life by years. If there’s already a small hole, trim any loose fibers, apply a small piece of iron-on interfacing to the inside of the sleeve for stability, then sew the patch over the top.