Quick Answer: The four main ways to sew granny squares together are the whip stitch (easiest for beginners), flat slip stitch (strongest and most durable), sewing machine join (fastest for quilting and mixed-media projects), and join-as-you-go (most efficient for large blankets). Whichever method you choose, blocking every square to a uniform size first is the single step that makes or breaks the finished result.
Learning how to sew granny squares together is genuinely the hardest part of most granny square projects — not because any single method is complicated, but because consistency across dozens (or hundreds) of seams is unforgiving. One wobbly join, one skipped corner, one square that’s ¼ inch (6mm) too small, and the whole thing shows it. This guide covers all four main methods in full detail, plus the mistakes that trip people up most often.
At a Glance: Which Method Should You Use?
| Method | Skill Level | Seam Visibility | Durability | Speed |
|---|---|---|---|---|
| Whip Stitch (BLO) | Beginner | Low–Medium | Good | Medium |
| Flat Slip Stitch | Intermediate | Low | Excellent | Medium |
| Sewing Machine | Intermediate | Low | Very Good | Fast |
| Join-As-You-Go | Intermediate | None | Excellent | Fast (overall) |
What You Need Before You Start Joining Granny Squares
Yarn Weight, Fiber, and Color
Here’s something most tutorials skip: joining yarn that’s one weight lighter than your squares dramatically cuts bulk at the seams. If your squares are worsted weight, try DK for joining. The seam sits flatter and the finished fabric drapes better — it’s a small change that makes a noticeable difference.
Fiber content matters too. Acrylic is forgiving — it blocks easily, it’s machine washable, and it has just enough stretch to keep tension consistent. Cotton is heavier and less elastic, so you’ll need to work your joins slightly looser than feels natural. Wool-acrylic blends are my personal favorite because they’re elastic enough to forgive minor tension inconsistencies without going floppy.
One more thing on color: a contrasting joining yarn — charcoal on multicolored squares, for instance — creates a stained-glass effect that looks completely intentional and actually hides slight tension variations. It’s a great trick for a first project.
Needles, Hooks, and Sewing Machine Feet
- Blunt-tip tapestry needle, size 13 — for worsted weight yarn
- Blunt-tip tapestry needle, size 16 — for DK or sport weight
- Crochet hook, 4.0–5.0mm — one size smaller than you used for the squares
- Sewing machine needle, 90/14 universal or jeans — the slightly reinforced shaft handles crochet density without snapping
- Walking foot — essential for machine joining; it feeds both layers evenly over the textured crochet surface
- Zipper foot — useful when sewing very close to the crochet border edge
Notions and Blocking Supplies
- Locking stitch markers (at least 20 for a blanket project)
- T-pins or blocking pins
- Interlocking foam blocking mats — at least 24 × 24 inches (61 × 61cm) of surface
- Spray bottle with water
- Seam gauge
- Seam roller — more useful than an iron for flattening crochet seams, especially with acrylic
Before You Sew: How to Block Granny Squares for a Perfect Join
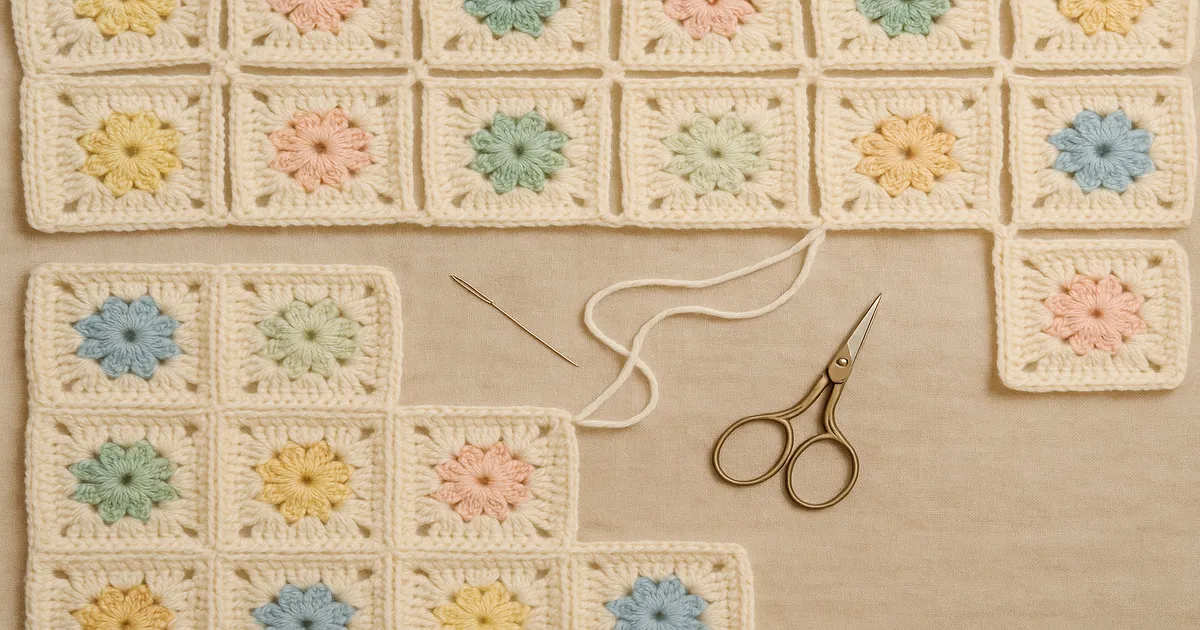
Unblocked squares can vary by up to ½ inch (12mm) from each other — even when made with the same hook, yarn, and pattern. That’s enough to make alignment genuinely impossible and leave your finished project looking wavy and bunched. Any squares still varying by more than ¼ inch (6mm) after blocking will create visible misalignment at the seams.
Before you block anything, mark the right side of every square with a locking stitch marker. After handling 40 squares, it becomes surprisingly hard to tell right from wrong side on some yarns, and one reversed square in a finished blanket is heartbreaking.
Wet blocking works well for most fibers: mist each square thoroughly, pin to your blocking mats, and leave to dry completely. Steam blocking is faster — hold a steam iron about 1 inch (2.5cm) above the surface and let the steam do the work. Never let the iron touch the crochet, especially with acrylic, which can melt or go shiny under direct heat.
Use the printed grid on your blocking mats to pin every square to the same target dimensions — typically 6 × 6 inches (15 × 15cm) for worsted weight. Pin all four corners first, then the midpoint of each side. Pre-sort squares by gauge before you start: even with identical materials, squares from different skeins can run slightly different sizes, and grouping similar ones together speeds up the whole process.
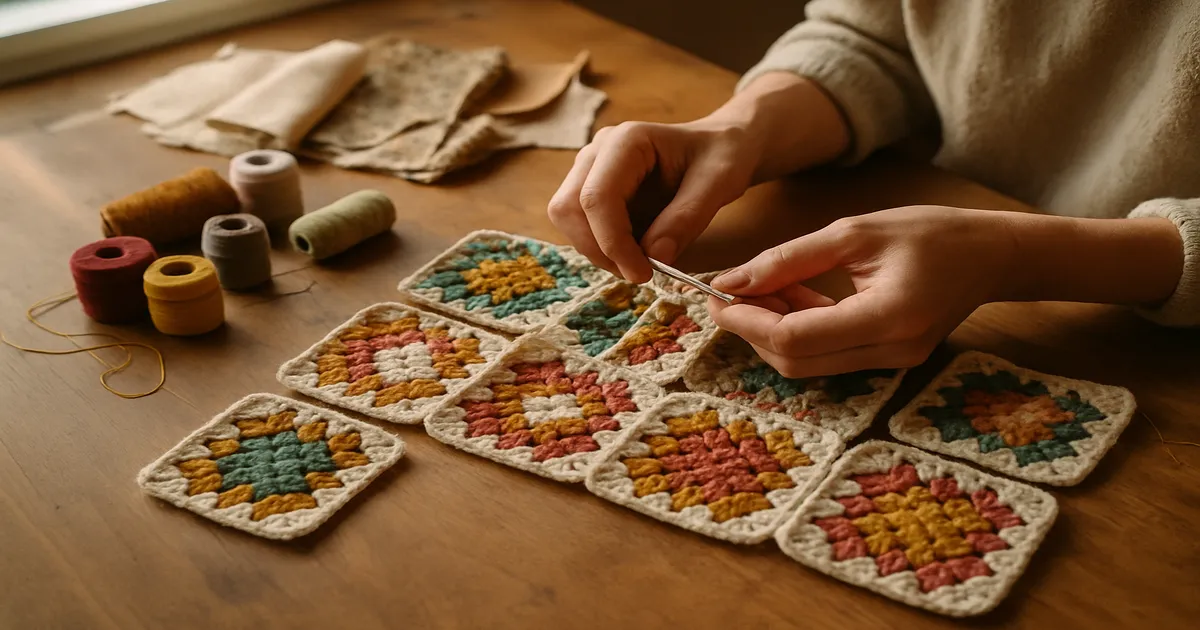
Method 1: Whip Stitch — The Best Way to Sew Granny Squares Together for Beginners
Cut joining yarn to 24 inches (61cm) — no longer. Longer lengths fray, tangle, and lose their twist before you finish a seam. Thread a size 13 blunt tapestry needle and hold two blocked squares together. Wrong sides together gives you a decorative raised seam on the right side; right sides together hides it completely. Pin at each corner and at the center of the edge.
Step-by-step:
- Insert the needle through the outermost corner loops of both squares simultaneously. Leave a 4-inch (10cm) tail — don’t knot it, just work the first few stitches over it to secure it.
- Whip stitch through the back loops only of corresponding edge stitches across both squares. Back loops only keeps the seam flatter and preserves stitch definition.
- Work one whip stitch per stitch along the edge. For a standard 6-inch (15cm) square with 12 edge stitches per side, that’s 12 stitches per seam.
- Keep tension firm and even — tight enough that there’s no gap, loose enough that the seam doesn’t draw up.
The corner problem: When you reach a corner, work 2–3 whip stitches into the corner chain space rather than skipping over it. Skipping leaves a triangular hole at every four-square intersection, and there’s no fixing it without ripping back.
Finishing: End with two stitches worked on top of each other to lock the seam. Weave the tail through at least 5 stitches on the wrong side in a zigzag, then reverse direction for 3 stitches before trimming to about ½ inch (12mm). A light steam — iron held 1 inch (2.5cm) above — helps it lie flat.
Method 2: Flat Slip Stitch — The Strongest Crochet Join
If you’re making anything that’ll see real use — a bag, a garment, a blanket that gets washed every other week — the flat slip stitch is worth learning. It’s stronger than whip stitch and nearly invisible from the right side.
Use a crochet hook one size smaller than you used for the squares. Join with the same hook and the seam ends up looser than the surrounding fabric, and it shows. Hold two squares with right sides together.
Insert your hook through the back loop of the first stitch on the front square and the back loop of the corresponding stitch on the back square simultaneously. Draw up a loop, chain 1 to begin, then slip stitch through both back loops across the entire edge — insert hook, pull yarn through both stitches and the loop on hook at once.
Tension is everything here. Slip stitching too tightly is the most common error with this method. The join should have the same drape as the squares themselves. If the seam is drawing up, loosen your grip.
When joining multiple squares, always work into horizontal rows first, then join the rows together. At four-square intersections, work the joining stitch through all four corner loops simultaneously — this creates a clean junction instead of a lumpy pile-up.
Method 3: Sewing Machine Join — Fast Assembly for Mixed-Media Projects
This method gets overlooked in crochet circles, but quilters who work with crochet swear by it. Seams are flat, durable, and fast — ideal for vests, tote bags, and anything where you need the seam to behave like a sewn seam rather than a yarn join.
Machine setup:
- Foot: Walking foot for most joins; zipper foot when sewing very close to the crochet border edge
- Needle: 90/14 universal or jeans needle
- Thread: All-purpose polyester, weight 50/3
- Stitch length: 3.0–3.5mm — longer stitches reduce perforation of the yarn fibers
Lightly starch your blocked squares before machine sewing. It helps them hold their shape under the presser foot.
Pin right sides together with at least 4 pins per 6-inch (15cm) edge — crochet shifts under the foot more than woven fabric does. Sew at about half your normal speed with a ¼-inch (6mm) seam allowance, stitching through the outermost row of crochet stitches. Backstitch 3–4 stitches at the start and end of every seam.
Press seams open rather than to one side — it significantly reduces bulk at intersections. Use a seam roller or wooden clapper rather than pressing directly with the iron, especially on acrylic.
Method 4: Join-As-You-Go (JAYG) — No Finishing Seams Required
With JAYG, each new square is joined to the completed squares during its final crochet round. Instead of working chain spaces in the corners and edges, you replace those chains with slip stitches or single crochets worked directly into the edge of the adjacent finished square. When the last round is done, the square is already attached — no seaming required.
Planning is everything with JAYG. Follow a boustrophedon path — back and forth through the layout like reading lines of text — so each new square always has at least one completed neighbor to join to. Jump around randomly and you’ll end up with orphaned squares surrounded by gaps you can’t reach. Sketch your joining order on paper before you start.
JAYG is best for large blankets with 30 or more squares, where seaming time is genuinely painful. It requires intermediate crochet skills and careful pre-planning, but it eliminates hours of finishing work. For smaller projects or irregular layouts, one of the other methods is usually more practical.
6 Common Mistakes When Joining Granny Squares
Skipping blocking. Squares vary by up to ½ inch (12mm) without it, making alignment impossible. Block every square to the same dimensions before touching the joining yarn.
Inconsistent tension. Too tight and the seam puckers; too loose and you get gaps at corners. Practice on 2–3 test squares first. The join should feel the same as the squares — same drape, same flexibility.
Ignoring corner chain spaces. This causes triangular holes at every four-square intersection — visible from across the room. Always work 2–3 stitches into each corner chain space, and work through all four corner loops simultaneously where squares meet.
Yarn that’s too long. Lengths over 24 inches (61cm) fray, tangle, and lose their twist, resulting in a weaker, messier seam. Cut joining yarn into 24-inch lengths and join new pieces as needed.
Joining in the wrong order. Random joining creates awkward intersections. Always join into horizontal rows first, then join the rows. This isn’t optional — it’s structural.
Poorly woven ends. Short tails or tails woven in only one direction work loose with washing. Leave 4-inch (10cm) tails, weave in a zigzag through at least 5 stitches, then reverse direction before trimming.
Pro Tips for Joining Granny Squares Like an Expert
Photograph your layout before you sew a single stitch. Number each square in the photo. I’ve seen people join 20 squares only to realize the color distribution is completely wrong — and there’s no easy fix at that point. The photo takes two minutes and saves hours of regret.
Work in 3×3 blocks for large blankets. For blankets over 30 squares, join nine squares into a block first, then join the blocks together. It keeps the project manageable and stops the growing weight from pulling on your seams while you work.
Try the mattress stitch for invisible seams. Work through the inner loops of edge stitches on each square alternately — one loop from the left square, one from the right — pulling snug every 3–4 stitches. On the right side, you genuinely cannot see it. Slow, but worth it for heirloom projects.
Use color as a design element. A contrasting joining color — deep charcoal or navy — transforms a simple blanket into something that looks designed rather than assembled. Using a different color for each row of joins creates a beautiful grid effect and hides tension inconsistencies far better than a matching join.
Frequently Asked Questions About Joining Granny Squares
What is the easiest way to join granny squares for beginners?
The whip stitch. You just need a tapestry needle and some yarn, and the technique is straightforward to learn. Work through the back loops only of corresponding edge stitches, remember to work extra stitches into the corner chain spaces, and you’ll get a clean result fairly quickly.
How do you avoid holes at the corners when sewing granny squares together?
Always work 2–3 stitches into each corner chain space rather than skipping over it. Where four squares meet, work one joining stitch through all four corner loops at once. Skipping corners is the single most common source of gaps in finished projects.
Should you join granny squares in rows or columns first?
Rows first, always. Join into horizontal rows, then join the rows together. This creates clean, continuous seams and manageable four-way intersections. Joining randomly makes it nearly impossible to get neat junctions where multiple squares meet.
Can you sew granny squares together with a sewing machine?
Yes, and it works really well for mixed-media projects, garments, and bags. Use a walking foot, a 90/14 needle, polyester thread at 50/3 weight, and a stitch length of 3.0–3.5mm. Lightly starch your blocked squares first, sew slowly, and press seams open to reduce bulk at intersections.
What’s the difference between whip stitch and flat slip stitch?
Whip stitch uses a tapestry needle and yarn, stitching over the edge of both squares in a wrapping motion — easy to learn, produces a slightly raised seam. Flat slip stitch uses a crochet hook through the back loops of both squares simultaneously, creating a stronger, flatter join that holds up better to heavy use and repeated washing. For anything beyond a decorative wall hanging, the flat slip stitch is worth the extra learning curve.