Quick Answer: Square your log cabin blocks after completing all logs and pressing thoroughly — but before you assemble the quilt top. Even a 1/16-inch (1.5mm) error per block compounds fast: across 20 blocks, that’s over an inch of misalignment. Squaring individual blocks is the only fix, and it can’t be replaced by squaring the finished top.
Knowing when to square log cabin blocks is one of those things that separates a quilt that lies flat from one that waves at you from the design wall. The answer is: after the block is done, after it’s pressed, and before it joins any other block. Simple in theory. But there’s real nuance in the timing — and a few traps worth knowing before you pick up your rotary cutter.
Why Squaring Log Cabin Blocks Can’t Be Skipped
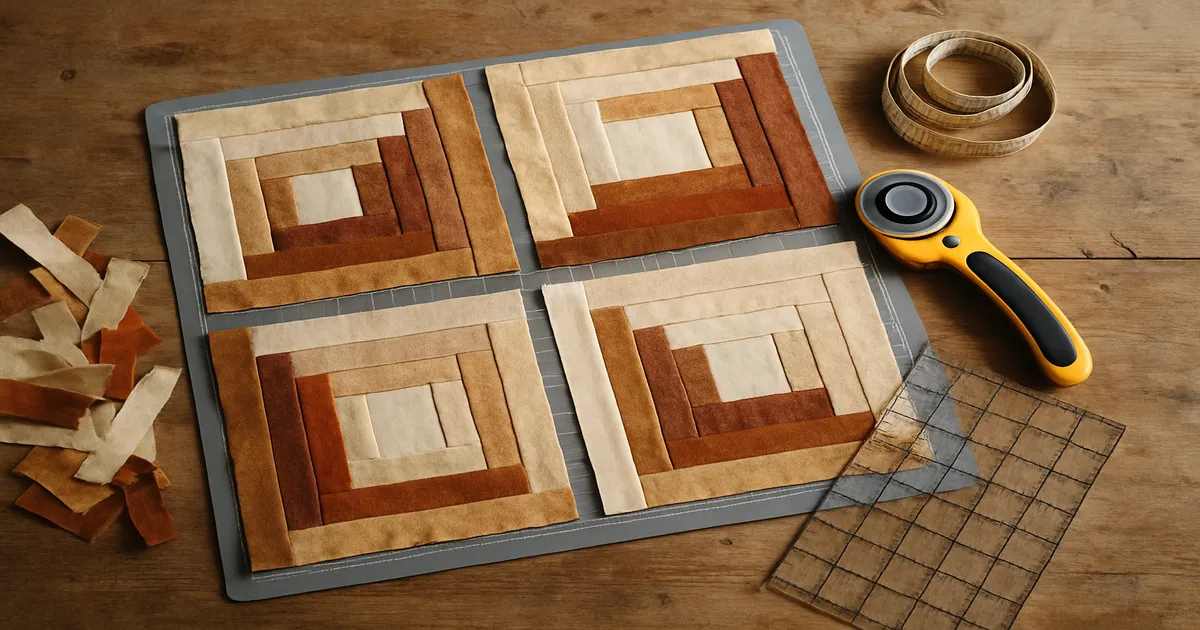
Log cabin blocks are sewn in a spiral (or symmetrical) pattern, which means you’re constantly changing sewing direction. Every time you add a log, you’re stitching across seams at a slightly different angle, and fabric — especially on the bias — stretches a little each time. Add in the sheer number of seams in a typical block and you’ve got a recipe for drift. It’s not that your sewing is bad. It’s just physics.
A single block that’s 1/16 inch (1.5mm) off doesn’t look like much. Multiply that across 20 blocks and you’re looking at more than an inch of cumulative misalignment. Rows won’t match up, seams won’t nest cleanly, and the finished top will have waves that no amount of blocking will fully fix.
One thing worth clarifying: squaring a finished quilt top is a valid step, but it only addresses the outer perimeter. It does nothing to correct distortion inside the top, where blocks meet each other. The two steps aren’t interchangeable — squaring individual blocks before assembly is the one that actually matters.
When to Square Log Cabin Blocks: The Three Stages
Stage 1: Square the Center Square Before You Begin
This is the foundation step. A center square that’s even slightly off-grain or imprecisely cut will cause every subsequent log to compound the error outward. Cut your center square to the exact unfinished measurement — a 2-inch (5cm) finished center should be cut at 2½ inches (6.35cm) — and confirm it’s actually square before you sew a single log. It takes thirty seconds and it’s worth it.
Stage 2: Square After Each Round of Logs (Optional, But Precise)
This is the precision method, and it’s genuinely useful if you’re working with shifty fabrics or making a large batch of identical blocks. After each complete round of logs, you trim to a calculated intermediate size. If your center is a 2-inch (5cm) finished square and your logs are 1½ inches (3.8cm) finished, the block after round one should measure 5½ inches (14cm) unfinished.
It works beautifully, but it requires careful math and wastes slightly more fabric. Honestly, save this approach for once you’ve got a few log cabin quilts under your belt.
Stage 3: Square the Completed Block (The Standard Approach)
This is what most quilters do, and it’s the right call for most projects. Here’s the full process:
- Complete all logs and press every seam thoroughly.
- Let the block rest for 5–10 minutes so the fabric stabilizes and any steam evaporates fully.
- Determine your target unfinished size. A 12-inch (30.5cm) finished block needs to measure 12½ inches (31.75cm) unfinished — that ½ inch (12.7mm) accounts for the ¼-inch (6mm) seam allowance on all four sides.
- Place the block face-up on your mat. Align your ruler’s center lines with the center seam intersection of the block — not the outer edge.
- Trim two adjacent sides with clean, single-pass cuts.
- Rotate the block 180 degrees and trim the remaining two sides to hit your target measurement.
- Check all four corners with the corner of your ruler to confirm 90 degrees.
Pressing Protocol: Do This Before You Square Anything
Press Every Seam Before Adding the Next Log
Unpressed seams create hidden bulk that shifts under the ruler. You’ll think the block is square, and it won’t be. Press to the dark side to prevent show-through, or press open if you want the flattest possible result — both work, just stay consistent within a project.
Steam vs. Dry Iron
Steam gives you more control over stubborn seams, but it introduces moisture that temporarily stretches the fabric. If you use steam, let the block cool completely on a flat surface before you measure anything. Blocks squared while still warm can be off by up to 1/8 inch (3mm) on a 12-inch block — that’s not a rounding error, that’s a real problem.
A dry iron at the cotton setting works fine for most quilting cotton, especially if you’ve used a light coat of spray starch. Starch stiffens the block temporarily so it doesn’t shift under the ruler, and it makes a noticeable difference.
The Press-and-Lift Technique
Never drag the iron across the block. Set it down, apply pressure, lift straight up, move to the next section. Dragging stretches bias edges and undoes the careful sewing you just did. The rhythm is simple: press, rest, square.
Tools That Make Squaring Log Cabin Blocks Accurate
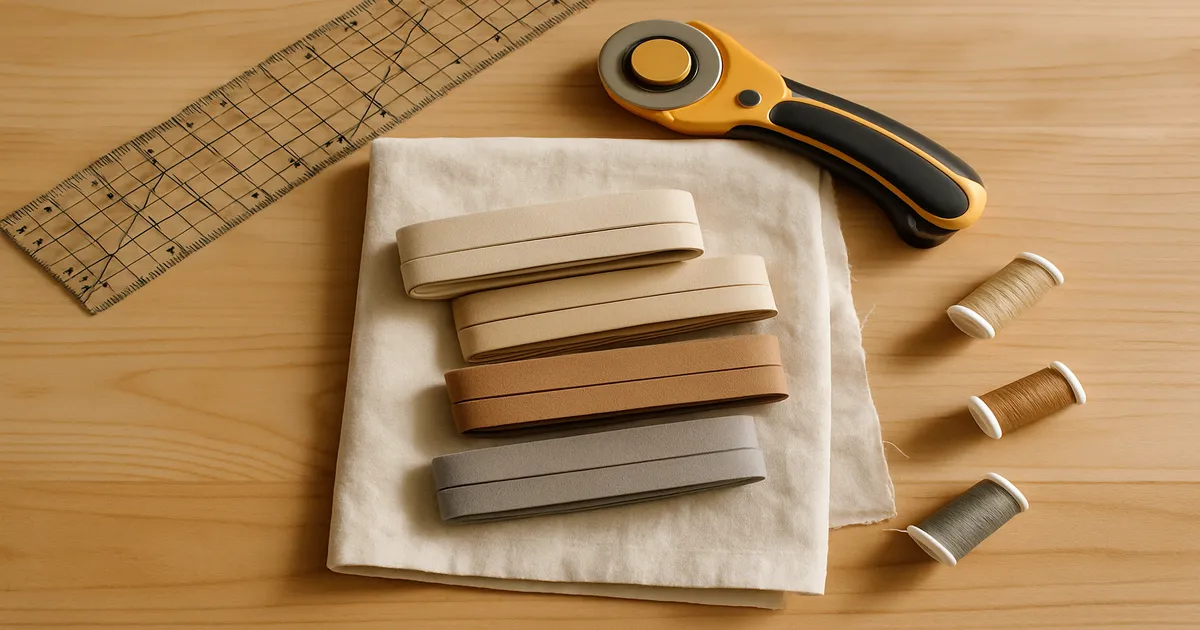
The Right Square Ruler
You need a large square acrylic ruler — 12½ inches (31.75cm) covers most standard log cabin block sizes, though a 15-inch (38cm) is useful for larger blocks. Omnigrid and Creative Grids are both reliable.
The standout tool for this specific job is the BLOC LOC Log Cabin Square Up Ruler. It has a recessed channel on the back that locks directly onto the center seam of a log cabin block, making centering virtually foolproof. If you make log cabin quilts regularly, it earns its shelf space fast.
Rotary Cutter and Mat
A 45mm rotary cutter handles most squaring work cleanly. For smaller blocks, a 28mm gives you more control in tight spots. Sharp blades matter more than most people admit — a dull blade drags the fabric sideways as it cuts, which defeats the whole point.
Your mat should be at least 18 × 24 inches (45 × 61cm). Smaller and you’ll be repositioning constantly, which introduces error. A non-slip underlay under the mat keeps everything from sliding mid-cut.
Common Mistakes When Squaring Log Cabin Blocks
Squaring before pressing. The block will look square. It won’t actually be square. Press first, always.
Centering the ruler on the block edge instead of the center square. This is the most visually damaging mistake specific to log cabin blocks. If you align to the outer edge, you’ll trim one side more than the other and the center square will look off-center in the finished block. The whole design is built around that center — keep it there.
Trimming too aggressively to fix a distorted block. If a block is more than ½ inch (1.3cm) off, trimming it down just makes a smaller problem block. Partially unsew, re-press, and try again. Squaring cleans up minor variation; it can’t rescue a structurally broken block.
Inconsistent seam allowances. If your seam allowances drifted from log to log — some at ¼ inch (6mm), some creeping to 3/8 inch (9.5mm) — the block’s proportions are off and squaring won’t fix that. Test your ¼-inch foot on scrap fabric before starting a project. Sew, press, measure. The result should match your expected dimensions exactly.
Squaring Variations for Different Log Cabin Styles
Foundation paper piecing (FPP). FPP blocks are more accurate than traditionally pieced ones because the paper foundation keeps everything on-grain. You’ll still want to square after removing the paper — the block relaxes a little once the stabilizer is gone.
Courthouse Steps. Logs are added to opposite sides rather than in a spiral, making the block more symmetrical. The squaring process is identical, but centering the ruler is a little easier since the block is balanced on all four sides.
Scrappy and improv log cabin blocks. With improv blocks, logs are intentionally varied in width and length. Squaring still happens at the end, but your target size is determined by the smallest block in the batch — everything else gets trimmed down to match. It wastes more fabric, but that’s the trade-off for creative freedom.
Quilt-as-you-go (QAYG). QAYG blocks get layered with batting and backing and quilted before joining. Square them after quilting but before joining — and account for quilting shrinkage, which typically runs 1–3%. If your blocks are consistently coming out slightly small, adjust your target size for the whole project rather than forcing undersized blocks to work.
Frequently Asked Questions
Do you have to square up log cabin blocks before assembling a quilt?
Yes. Skipping it is one of the most common reasons log cabin quilts end up wavy and mismatched. Even blocks that look fine individually will cause problems when sewn together if they’re not trimmed to a consistent size. Squaring takes about two minutes per block and saves hours of frustration later.
What size should log cabin blocks be after squaring?
Your target is the finished block size plus ½ inch (12.7mm) for seam allowances. A 12-inch (30.5cm) finished block should measure 12½ inches (31.75cm) after squaring. If your blocks are consistently running small, adjust the target size for the whole project rather than trying to force them.
How do you center a ruler on a log cabin block when squaring?
Find the center seam intersection — where the first logs meet the center square — and align your ruler’s diagonal or crosshair markings to that point. A BLOC LOC ruler makes this easier because its recessed channel locks directly onto the center seam. The key is to center on the block’s center, not the outer edge.
Can you square log cabin blocks after the quilt top is assembled?
You can square the outer edges of a finished quilt top, but that only addresses the perimeter. It can’t correct misalignment between blocks inside the top. If you skip squaring individual blocks before assembly, there’s no good fix after the fact.
What’s the best ruler for squaring log cabin blocks?
A standard 12½-inch square ruler works fine, but the BLOC LOC Log Cabin Square Up Ruler is genuinely better for this specific task. The recessed channel on the back locks onto the center seam of the block, so you’re not eyeballing the center — it’s locked in. Worth it if you make log cabin quilts more than once or twice a year.