Quick Answer: Double fold bias tape is a strip of fabric cut at 45 degrees to the grain, folded twice so all raw edges are completely enclosed. To apply it, open the tape, stitch the first fold to your fabric edge with right sides together, then wrap the tape to the back and secure it by stitching in the ditch, topstitching, or slip stitching by hand. The off-center pressing trick — making the back side 1/16 inch (1.5mm) wider than the front — is what makes the whole thing work reliably.
Learning how to sew double fold bias tape is one of those skills that suddenly makes a dozen other things click. Once you’ve got it, you’ll use it constantly — finishing necklines, binding quilts, trimming aprons, casing drawstrings. It looks polished, it’s forgiving once you understand the logic, and making your own means you can match any fabric perfectly.
What Is Double Fold Bias Tape?
Double fold bias tape is a narrow strip of fabric cut on the true bias — at a 45-degree angle to the selvage — and folded twice. The first fold brings both raw edges in to meet at the center (that’s single fold tape). The second fold brings those two halves together into a compact strip with no exposed raw edges anywhere.
The standard packaged version finishes at 1/2 inch (12mm) wide. Unfold it completely and it measures about 2 inches (50mm) flat, which gives you the key rule: cut your strips 4× the desired finished width. You’ll find packaged tape from 1/4 inch (6mm) up to 2 inches (50mm), but making your own is almost always worth it for the color and fabric match.
Single Fold vs. Double Fold
Single fold tape has both raw edges pressed toward the center — open in the middle, like a hot dog bun. Use it for casings or decorative trim where it’ll be enclosed in a seam. Double fold adds that final center fold, making it ready to wrap around a raw edge and stitch down on both sides. For binding and edge finishing, double fold is almost always what you want.
When to Use It
- Finishing necklines and armholes
- Binding quilt edges
- Hemming curved edges on aprons, table linens, and children’s clothing
- Drawstring or elastic casings (go wider — 1 inch/25mm or more)
- Decorative contrast trim
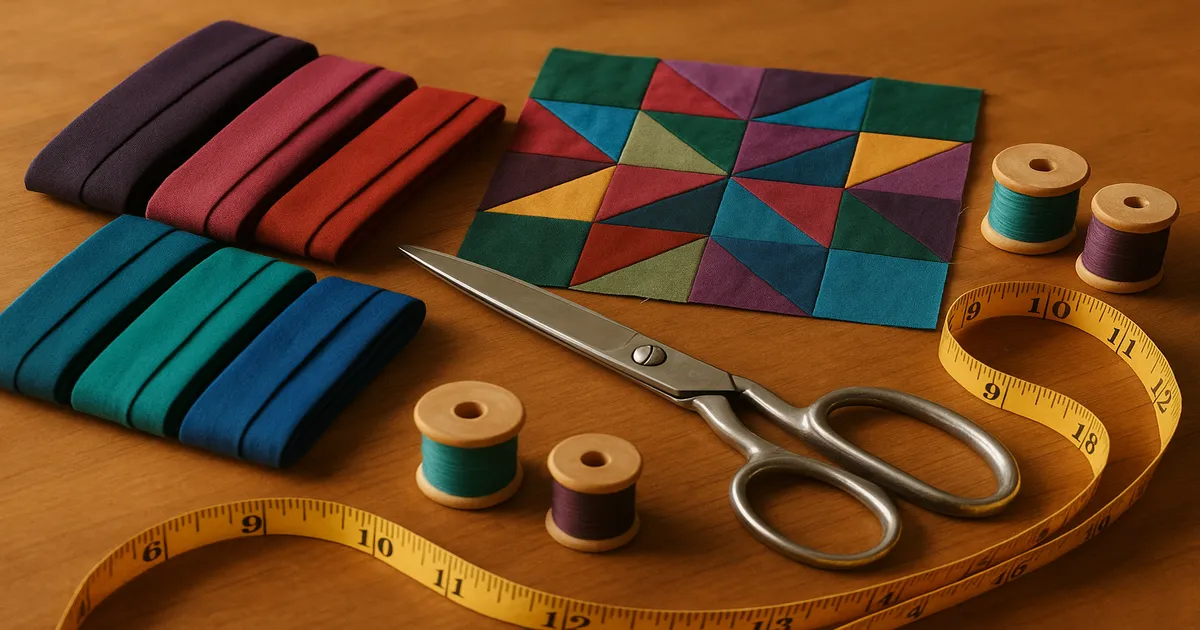
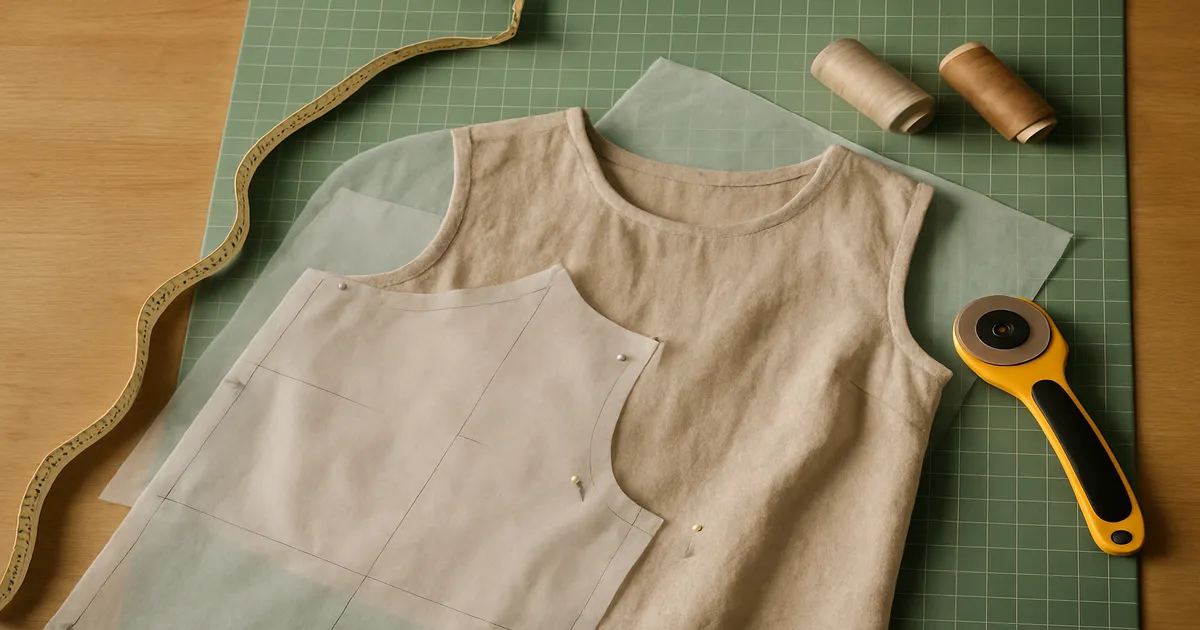
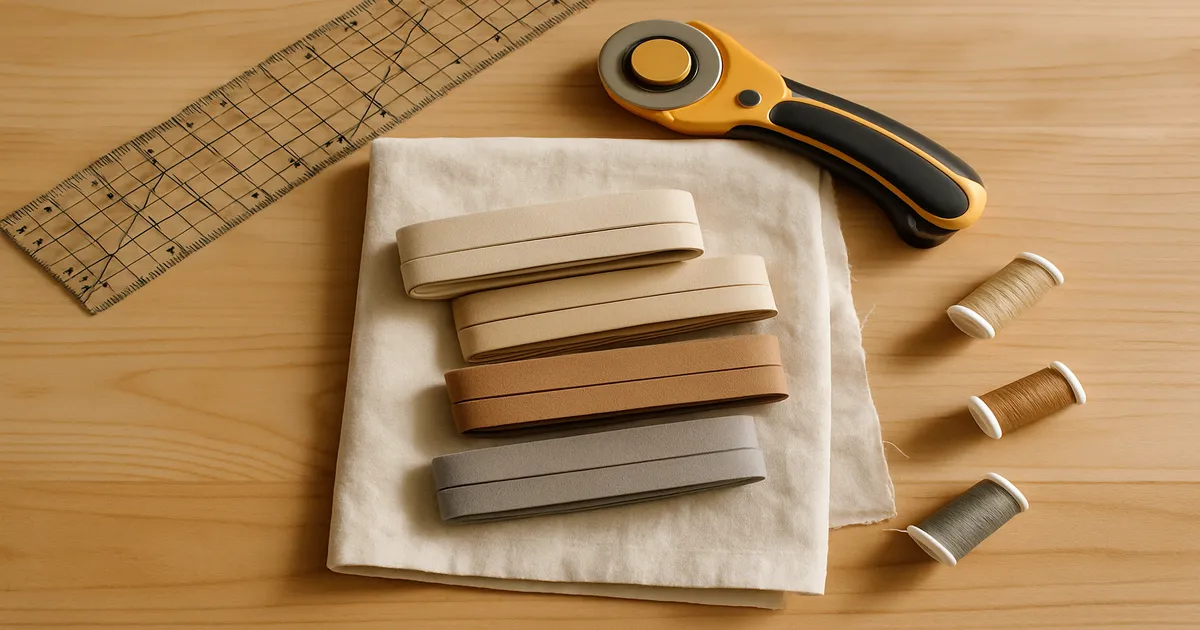
Tools and Materials
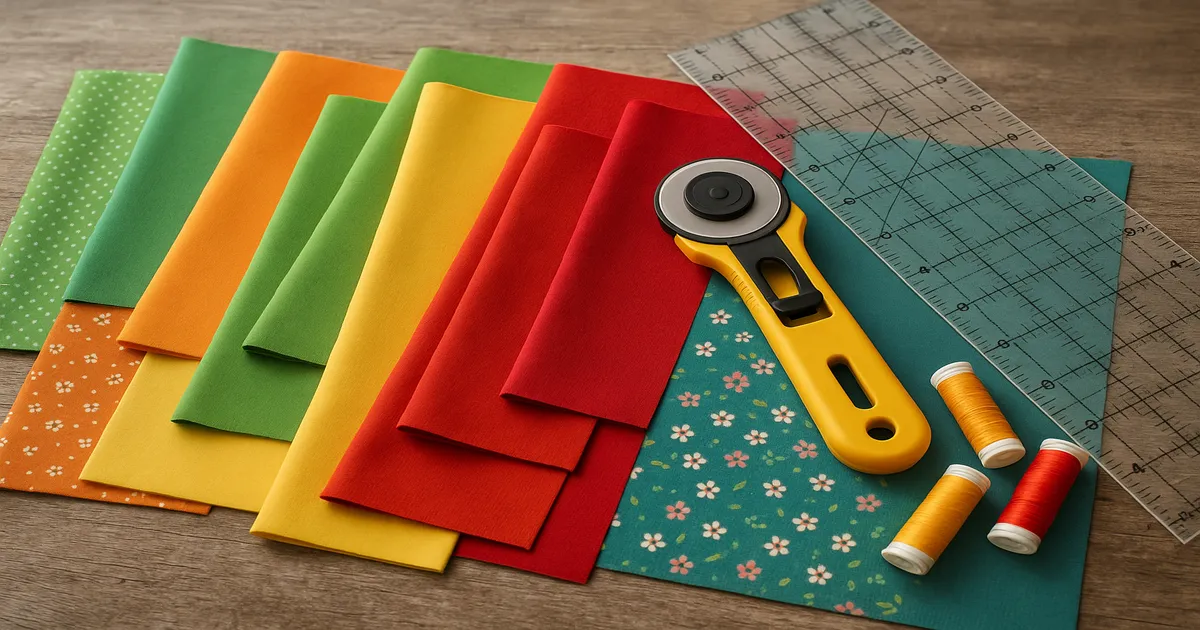
Best Fabrics for Making Bias Tape
Quilting cotton is the go-to for most people, and it earns that reputation — it presses crisply, frays minimally on the bias, and comes in every print imaginable. Lightweight linen or a linen-cotton blend gives beautiful drape for garment binding. Rayon challis is wonderful for necklines because it’s so soft and flexible. Silk habotai works for heirloom pieces, but handle it carefully and use a cooler iron.
Skip knits (they stretch unpredictably and won’t press into crisp folds), loosely woven fabrics (they shred on the bias), and anything heavy like denim or canvas (too bulky when folded four times).
A fat quarter (18 × 22 inches / 45 × 55cm) of quilting cotton yields roughly 3–4 yards (2.75–3.65m) of 2-inch (50mm) bias strips. A half yard gets you 6–8 yards (5.5–7.3m).
Thread, Needles, and Presser Feet
Thread: 50-weight cotton is the right call for most applications — fine enough to stay flat, strong enough to hold. Aurifil 50wt is my personal go-to and worth every penny.
Machine needles: A 70/10 or 80/12 universal needle handles lightweight to medium cotton tape. Go up to a 90/14 if you’re sewing through quilt batting and backing.
Hand sewing: A size 10 or 11 sharps needle is ideal for slip stitching the back fold — the fine point slides through folded fabric cleanly.
Presser feet: An edgestitch foot gives you perfectly consistent topstitching along the tape’s edge. A walking foot is non-negotiable when applying binding to quilts — it feeds all those layers evenly and prevents the creeping that ruins an otherwise clean finish.
Essential Notions and Equipment
- Bias tape maker — Clover makes the most reliable ones, in 6mm, 12mm, 18mm, and 25mm sizes
- 45mm rotary cutter and a 6 × 24-inch (15 × 60cm) quilting ruler with 45-degree markings
- Self-healing cutting mat, at least 18 × 24 inches (45 × 60cm)
- Steam iron — bias tape is genuinely about 50% sewing and 50% pressing
- Pressing ham for curved sections
- Wonder Clips instead of pins — they grip without distorting the layers
- A stiletto for guiding tape under the presser foot
How to Make Your Own Double Fold Bias Tape
Step 1: Pre-Wash Your Fabric
Wash, dry, and press before you cut anything. Skipping this is how you end up with a beautifully finished neckline that puckers the first time it goes through the wash.
Step 2: Find the True 45-Degree Bias
Lay your fabric flat on the cutting mat. Fold one corner so the selvage aligns with the crosswise grain — the resulting diagonal fold is your true bias. Press it lightly or use it to align your ruler. Always verify with your quilting ruler’s 45-degree line before cutting; don’t eyeball it.
Step 3: Cut Strips to Width
Cut strips parallel to the bias line using your rotary cutter and ruler:
| Finished width | Cut width |
|---|---|
| 1/4 inch (6mm) | 1 inch (25mm) |
| 1/2 inch (12mm) | 2 inches (50mm) |
| 1 inch (25mm) | 4 inches (100mm) |
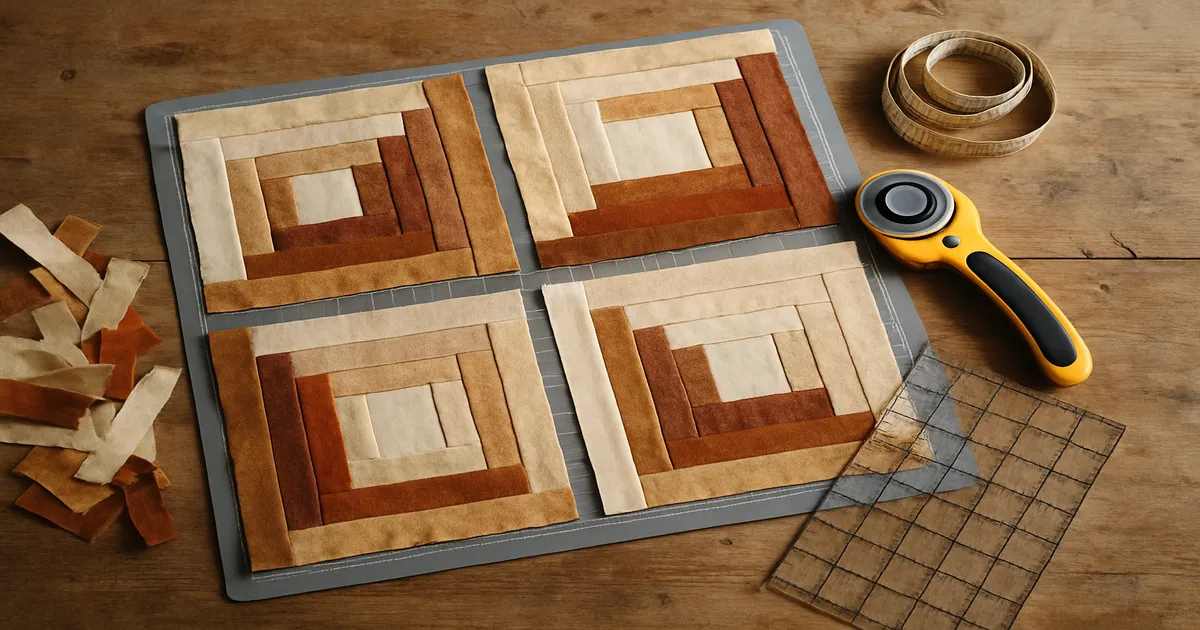
Step 4: Join Strips Without Bulk
Place two strips right sides together at a 90-degree angle, short ends overlapping in an “L” shape. Draw a diagonal line across the overlapping square and sew on that line with a 2.0–2.5mm straight stitch. Trim the seam allowance to 1/4 inch (6mm) and press open. This spreads the bulk diagonally across the tape width instead of creating a ridge. A straight perpendicular seam creates a lump you’ll feel in the finished piece forever — don’t do it.
Step 5: Press Into Single Fold
Feed the strip wrong-side-up into the wide end of your bias tape maker. Use a pin or stiletto to coax the fabric through. As the folded tape emerges from the narrow end, press immediately with a hot iron. Pull the tool forward steadily while you press — rush it and the folds shift. No tape maker? Fold both raw edges to the wrong side to meet at center and press carefully. It works fine, just takes longer.
Step 6: Press Into Double Fold — The Off-Center Trick
Fold the entire strip in half lengthwise. Here’s where most people go wrong: don’t center the fold exactly. The back side needs to be about 1/16 inch (1.5mm) wider than the front. That extra bit ensures the needle catches the back fold when you stitch from the front. Equal halves sound logical, but in practice you’ll miss the back layer constantly and end up hand-stitching it down anyway. Press firmly with steam.
Step 7: Store It Properly
Wind the tape around a piece of cardboard or a bias tape card and label it with the width and fabric content. Toss it loose in a drawer and you’ll be re-pressing the whole thing before your next project.
How to Sew Double Fold Bias Tape: Straight Edges
Applying the Tape
Trim the fabric edge clean and even. For quilts, baste the layers together within 1/8 inch (3mm) of the raw edge so nothing shifts. Open the bias tape completely and lay it right sides together against your fabric, raw edges aligned. The first fold crease should sit on your intended seam line — typically 1/4 inch (6mm) from the edge for garment work. Clip every 2–3 inches (5–7.5cm).
Sew along that first fold crease with a 2.0–2.5mm straight stitch. Backstitch at both ends. This is your anchor seam — everything else depends on it being straight.
Securing the Second Side
Fold the tape over the raw edge to the back. The wider folded edge (that 1/16-inch offset) should now be on the back, fully enclosing the raw edge. Press before you stitch. Then choose your finishing method:
Stitch in the ditch — From the right side, stitch in the groove of the first seam. The needle catches the back fold. Cleanest front appearance; most common for garments.
Topstitch from the back — Flip the work over and stitch 1/16 inch (1.5mm) from the folded edge. You’re guaranteed to catch the fold. The stitch line shows on the back, which is fine — I actually prefer this for quilts.
Hand slip stitch — Slowest and most beautiful. Use a size 10 sharps and thread matched to the tape. Worth it for heirloom work or anywhere the back will be seen up close.
Sewing Bias Tape Around Curves
Convex curves (necklines, rounded collars): Clip small notches into the seam allowance every 1/2 inch (12mm) before applying the tape. Gently stretch the inner edge of the tape as you pin — the bias grain is built for this.
Concave curves (armholes, scalloped edges): Clip straight into the seam allowance every 1/2 inch (12mm), stopping about 1/8 inch (3mm) from your stitch line. Ease the tape around the curve without pulling it taut — pulling stretches the tape and it’ll contract after stitching, causing ripples.
Before you sew any curved edge, steam press the tape into the curve over a pressing ham. This one step eliminates most of the puckering problems people blame on technique. Work slowly at the machine and use a stiletto to guide the tape under the presser foot.
Mitering Corners
Outside corners: Stitch to the exact corner point and backstitch — skip this and you’ll get a gap. Fold the tape up at 45 degrees away from the work, then fold it back down along the next edge to create the miter. Pin and continue stitching. When you wrap to the back, mirror the miter fold and press flat.
Inside corners: Clip into the fabric corner almost to the stitching line. As you approach the corner, spread that clip open so the fabric edge temporarily straightens — this lets you stitch through in a straight line. The tape folds naturally around the inside angle. A small tuck forms on the back; press it flat in one direction and tack it down if needed.
Common Mistakes
Cutting off the true bias. Even a few degrees off and the tape won’t stretch evenly around curves. Check your angle every time.
Skipping the pre-wash. The tape shrinks after application and the finished edge puckers. Always pre-wash.
Pressing the double fold symmetrically. Make the back 1/16 inch (1.5mm) wider. Every single time.
Pulling the tape while sewing. Bias tape stretches under tension. Pull it forward through the machine and it’ll contract after stitching, causing rippling. Let the feed dogs do the work.
Joining strips on the straight grain. A perpendicular seam creates a thick ridge. Always use the diagonal joining method.
Frequently Asked Questions
What’s the difference between single fold and double fold bias tape?
Single fold has both raw edges pressed toward the center, leaving it open — use it where the tape will be enclosed in a seam. Double fold takes that single fold tape and folds it in half again, enclosing all raw edges so it’s ready to wrap around and bind a raw edge on both sides at once.
How wide should I cut strips to make double fold bias tape?
Cut 4× the desired finished width. For 1/2-inch (12mm) finished tape, cut strips 2 inches (50mm) wide. For 1/4-inch (6mm) tape, cut 1-inch (25mm) strips. For 1-inch (25mm) quilt binding, cut 4-inch (100mm) strips.
Can I sew double fold bias tape without a bias tape maker?
Yes. Fold both raw edges toward the wrong side to meet at center, press, then fold the whole strip in half and press again. It takes more time but the result is identical. A bias tape maker just speeds up the single-fold pressing step — worth having if you make tape regularly, but not required.
How do I stop bias tape from puckering on curves?
Steam press the tape into the curve over a pressing ham before you stitch, and clip or notch the seam allowance so it can spread or compress. Never pull the tape taut as you sew — let the feed dogs move it. Pulling stretches the bias grain and it’ll pucker once the tension releases.
What’s the best fabric for homemade bias tape?
100% quilting cotton for most projects — it presses crisply, cuts cleanly on the bias, and comes in thousands of prints. For garments, try lightweight linen or rayon challis for a softer result. Avoid knits, loosely woven fabrics, and anything heavy. The fabric needs to fold into crisp layers without adding bulk.