Quick Answer: Thread gets stuck around the hoop because of rough wood grain, screw gaps, molding seams on plastic hoops, or unmanaged jump threads during machine embroidery. The three fastest fixes are sanding and sealing your hoop, wrapping the inner ring with twill tape, and trimming jump threads after every color stop. Hand embroiderers and machine embroiderers face slightly different versions of this problem — keep reading for whichever applies to you.
If you’ve ever watched a beautiful design grind to a halt because thread has wound itself around the hoop like a tiny, infuriating lasso, you’re not alone. Knowing how to keep thread from getting stuck around the hoop is one of the most common questions in both hand and machine embroidery — and most cases have a straightforward fix once you understand what’s actually causing the problem.
Why Thread Gets Stuck Around the Embroidery Hoop
Any surface irregularity on your hoop is a snag waiting to happen. A rough patch of wood grain, the gap around a screw, a molding seam on a plastic ring, a slight burr you can’t even see — thread is remarkably good at finding all of them, especially when it’s traveling at speed or under tension.
The problem shows up differently depending on how you embroider. In hand embroidery, thread usually catches on the inner ring as your needle moves through the fabric — rough wood and screw hardware are the main offenders. In machine embroidery, the bigger villain is jump threads: those loose tails left when the machine hops between sections of a design. A digitized design can involve thousands of thread passes in a single session, so every tiny snag point gets a lot of chances to cause trouble.
Thread weight matters too. A 12-weight cotton has a much larger surface area than 40-weight polyester, so it snags on things a finer thread would slip right past. Rayon threads are particularly prone to catching because their softer twist makes fiber ends more likely to grab. Silk, on the other hand, is so smooth it almost never causes hoop-catching issues — one reason experienced hand embroiderers love it.
How to Prepare Your Hoop So Thread Stops Catching
The Fingernail and Pantyhose Test
Before you hoop anything, run your fingernail slowly around the entire circumference of both rings. If your nail catches, your thread will too. For a more sensitive check, stretch a piece of old nylon stocking over the inner ring — it’ll snag on micro-burrs that your fingernail missed completely, especially on plastic hoop seams. Takes 30 seconds. Worth doing even on hoops you’ve used before, since wood develops new rough spots as humidity changes.
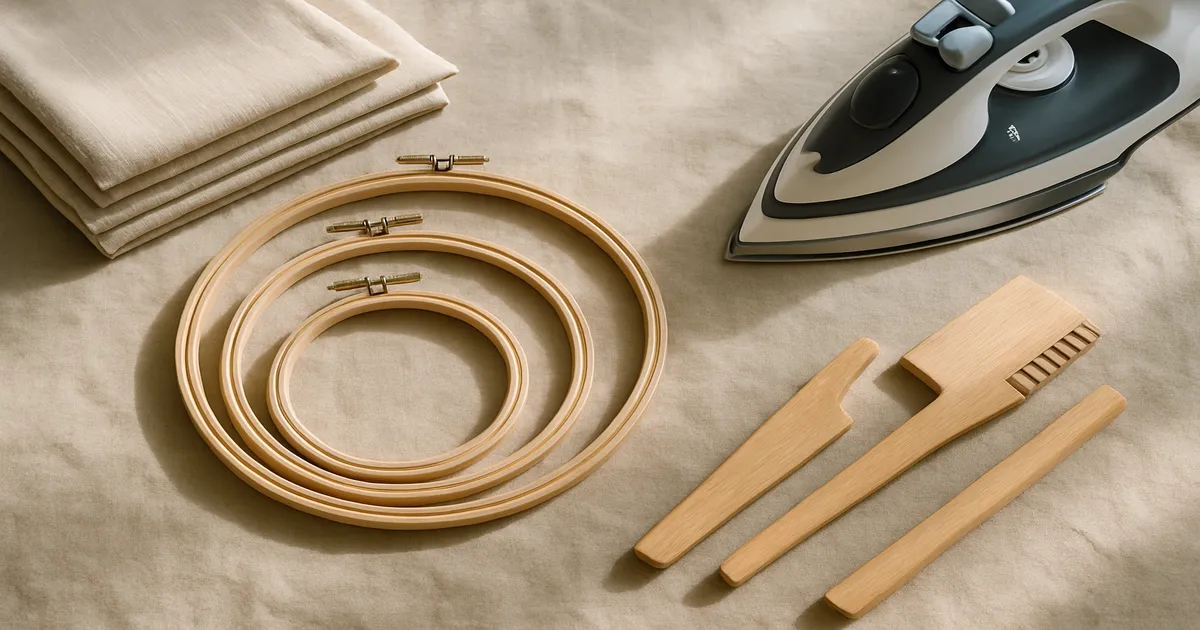
Sanding and Sealing Wooden Hoops
New wooden hoops are not ready to use straight from the package, no matter what the listing says. Start with 220-grit sandpaper, working with the grain around the entire ring, then finish with 400-grit for a smooth polish. Wipe away all dust with a tack cloth before sealing.
For sealing, you’ve got a few options:
- Beeswax — rub it directly onto the wood; quick and effective
- Clear nail polish — easy to apply, dries in about 2 hours
- Shellac — the most durable option, but allow a full 24 hours before use
Smoothing Plastic Hoops
Plastic hoops like Nurge or Elbesee are generally smoother than cheap wood, but they often have a faint seam line where the mold halves met during manufacturing. A few passes with a fine nail file takes care of it. Follow up with the pantyhose test to confirm it’s gone.
Wrapping the Inner Ring with Twill Tape
This is the single most effective thing you can do for a wooden hoop. It covers rough grain, bridges the screw gap, and grips fabric better than bare wood. Here’s how:
- Cut a length of ½-inch (12mm) twill tape long enough to wrap the entire inner ring with a little overlap.
- Start opposite the screw and wrap at a 45-degree angle, overlapping each pass by ¼ inch (6mm).
- Keep tension even — snug but not bunched.
- Secure the start and end with a few hand stitches or a small dab of fabric glue.
For hand embroidery, ¼-inch (6mm) satin ribbon is a lovely alternative — thread glides over it beautifully. Replace the wrapping every 6–8 months of regular use, or whenever it starts looking compressed or grubby.
How to Stop Thread Getting Stuck Around the Hoop During Machine Embroidery
Re-Thread the Machine Completely
Incorrect threading is the number-one cause of thread wandering around the hoop arm or hoop edge. Most home embroidery machines have 8–12 thread guides, and missing even one lets the thread drift outside its intended path. Re-thread with the presser foot raised — this opens the tension discs — and follow every numbered guide on the machine. Re-thread the bobbin too while you’re at it.
Hoop Drum-Tight with the Right Stabilizer
The fabric should be taut enough that tapping the center produces a sound like a snare drum. Loose fabric shifts during stitching and drifts toward the hoop edge, which is exactly where snags happen. Match your stabilizer to your fabric:
- Cut-away (2.5 oz) for stretchy fabrics
- Tear-away (1.5–2 oz) for stable wovens
- Water-soluble topping for terry cloth or fleece, to keep thread from sinking into the pile
Trim Jump Threads After Every Color Stop
Don’t wait until the design is done. After each color stop, trim jump threads to about ¼ inch (6mm) before restarting the machine. If your machine has an automatic thread trimmer, use it — it cuts tails down to roughly ⅛ inch (3mm), which is nearly impossible to tangle. Some digitizing software also lets you resequence stitching order to minimize jumps altogether; use that feature whenever you can.
Use the Thread Tail Tuck at Design Start
At the very start of a design, hold the top thread tail toward you and slightly to the left for the first 8–10 stitches, then release. The machine stitches over the tail and locks it in place. Trim it flush afterward. This one small habit prevents a surprising number of wrap-around tangles.
Slow Down on Dense Designs
Running a dense design at full speed (800–1,000 SPM) means problems compound faster than you can catch them. Drop to 400–600 SPM for any design that’s heavily saturated or stitches close to the hoop edge. Yes, it takes longer. It takes a lot less time than picking out a bird’s nest.
How to Stop Thread Getting Stuck Around the Hoop During Hand Embroidery
Keep Thread Lengths Short
Cut your thread to 18 inches (46cm) maximum. Longer thread twists on itself as you stitch, and twisted thread has a larger effective diameter — which means it catches on things a straight thread wouldn’t. For very fine threads (80-weight or finer), 12 inches (30cm) is even better.
Condition Your Thread
Draw your thread across a Thread Heaven or Thread Magic conditioner block before threading your needle. It reduces static, smooths frayed fiber ends, and makes the thread noticeably more cooperative. Honestly, this is the step most hand embroiderers skip, and it makes a real difference — especially with stranded cotton floss, which grabs on everything.
Use the Thread Drop Technique
Every 4–6 stitches, drop your needle and let it hang freely. The thread untwists under its own weight. It sounds fussy, but it becomes automatic quickly and genuinely reduces catching.
Rotate the Hoop Regularly
Get into the habit of rotating your hoop 90 degrees every 20–30 minutes. If you always pull thread across the same section of the ring, you’ll eventually wear a groove into the wood — and that groove becomes its own snag point.
Best Hoops and Tools to Prevent Thread Snags
Hoop Types at a Glance
| Hoop Type | Best For | Notes |
|---|---|---|
| Hardwood (beech, birch) | Hand embroidery | Must be prepped; quality varies widely |
| Plastic (Nurge, Elbesee) | Hand embroidery | Smoother and more consistent than cheap wood |
| Q-Snap frames | Hand embroidery | No ring edge at all — eliminates the problem entirely |
| OEM machine hoops | Machine embroidery | Always use the manufacturer’s hoop for best fit |
| Magnetic hoops | Machine embroidery | No screw gap; smooth continuous edge |
Are Magnetic Hoops Worth It?
For anyone doing regular machine embroidery, yes — absolutely. Magnetic hoops like the Mighty Hoop have no screw mechanism, no gap, and a low smooth profile that gives thread almost nothing to catch on. They run $40–$120 USD depending on size, which feels steep until you’ve spent 45 minutes untangling a design at the finish line.
The Short Supply List
Everything you actually need to solve this problem:
- Thread Heaven or Thread Magic conditioner
- Beeswax block
- 220-grit and 400-grit sandpaper
- ½-inch (12mm) twill tape
- Tack cloth
- Small sharp embroidery scissors
- A piece of old nylon stocking for testing
One more thing worth mentioning: if you’ve identified a specific spot on the hoop that keeps catching thread, a strip of blue painter’s tape over that spot is a perfectly valid temporary fix. Replace it every 2–3 sessions.
Needle Choice for Machine Embroidery
Use a 75/11 needle with standard 40-weight thread. Titanium-coated needles last 3–5 times longer than standard ones and hold their point better, which reduces drag. Replace your needle every 8–10 hours of stitching time regardless — a dull needle creates more friction, and more friction means more catching.
Frequently Asked Questions
Why does my embroidery thread keep wrapping around the hoop?
The most likely causes are an unprepped hoop surface (rough wood grain or a screw gap), incorrect machine threading that lets thread wander off its intended path, or unmanaged jump threads that loop around the hoop edge as the machine moves. Start by re-threading your machine completely and trimming any existing jump threads, then run the fingernail test on your hoop surface.
How do you wrap an embroidery hoop inner ring to prevent thread snags?
Use ½-inch (12mm) twill tape and wrap the inner ring at a 45-degree angle, overlapping each pass by ¼ inch (6mm). Secure the ends with a few hand stitches or fabric glue. The whole process takes about 10–15 minutes and lasts 6–8 months of regular use. For hand embroidery, ¼-inch satin ribbon is a smooth alternative that thread glides over easily.
What’s the best hoop to prevent thread from catching during machine embroidery?
Magnetic hoops — specifically the Mighty Hoop or Snap Hoop Monster — are the best option. No screw mechanism, no gap, smooth continuous edge. They cost $40–$120 USD, but for anyone doing regular machine embroidery, that investment pays off quickly in avoided tangles and ruined designs.
How do I stop jump threads from tangling around my embroidery hoop?
Trim jump threads to ¼ inch (6mm) after every color stop — don’t wait until the design is finished. If your machine has an automatic thread trimmer, use it; it cuts tails down to about ⅛ inch (3mm). You can also use digitizing software to resequence your design and reduce the number of jumps generated in the first place.
Does thread conditioner actually help stop thread from catching?
Yes, genuinely. Thread Heaven or beeswax reduces static, smooths frayed fiber ends, and gives the thread a slightly slicker surface — all of which make it less likely to grab on rough spots. It’s not a substitute for properly preparing your hoop, but used together with a sanded and wrapped ring, the difference is noticeable, especially with stranded cotton floss.