Quick Answer: The five best quilt pattern ideas for beginners are the Nine-Patch, Rail Fence, Log Cabin, Half-Square Triangles, and Flying Geese. All five use straight lines and simple geometry — no curves, no set-in seams — and together they teach every foundational skill you need: accurate cutting, a consistent ¼-inch (6mm) seam allowance, and proper pressing. A motivated beginner can finish a lap-quilt top in a weekend.
Which Quilt Pattern Ideas for Beginners Actually Work?
If you’re new to quilting, the pattern you choose matters more than the fabric, the machine, or anything else. Pick something too complex and you’ll spend your first project unpicking seams instead of building confidence. The five patterns below are ordered roughly by skill level, though even the trickiest one — Flying Geese — is totally manageable once you’ve made a few Nine-Patch blocks.
Here’s a quick difficulty snapshot:
| Pattern | Finished Block Size | Difficulty |
|---|---|---|
| Nine-Patch | 9 in (22.9 cm) | ★☆☆☆☆ |
| Rail Fence | 6 in (15.2 cm) | ★☆☆☆☆ |
| Log Cabin | 12 in (30.5 cm) | ★★☆☆☆ |
| Half-Square Triangles | 3 in (7.6 cm) unit | ★★☆☆☆ |
| Flying Geese | 3×6 in (7.6×15.2 cm) unit | ★★★☆☆ |
Every pattern here builds on the same core skills: cutting fabric accurately with a rotary cutter, sewing a consistent ¼-inch (6mm) seam, and pressing (not ironing — there’s a real difference) your seams flat. Get those three things down and you can make almost anything.
What You Need Before You Start
You don’t need much, but the right tools make a genuine difference. Here’s what I’d call non-negotiable:
- Rotary cutter — a 45mm blade is the most versatile size
- Self-healing cutting mat — at least 18×24 inches (45×61 cm)
- Quilting ruler — a 6×24-inch (15×61 cm) acrylic ruler for cutting strips
- Sewing machine with a ¼-inch foot — the single most important machine accessory you’ll buy
- Fabric-marking pencil or Hera marker
- Iron and a firm pressing surface — not a fluffy ironing board cover; a hard surface gives you much better control
Pre-cut fabric bundles are worth knowing about too. Jelly rolls (2½-inch / 6.4 cm strips) and charm packs (5-inch / 12.7 cm squares) lower the barrier to entry significantly — the cutting’s already done and the fabrics coordinate. They’re especially handy for the Rail Fence and Nine-Patch.
The 5 Best Quilt Pattern Ideas for Beginners
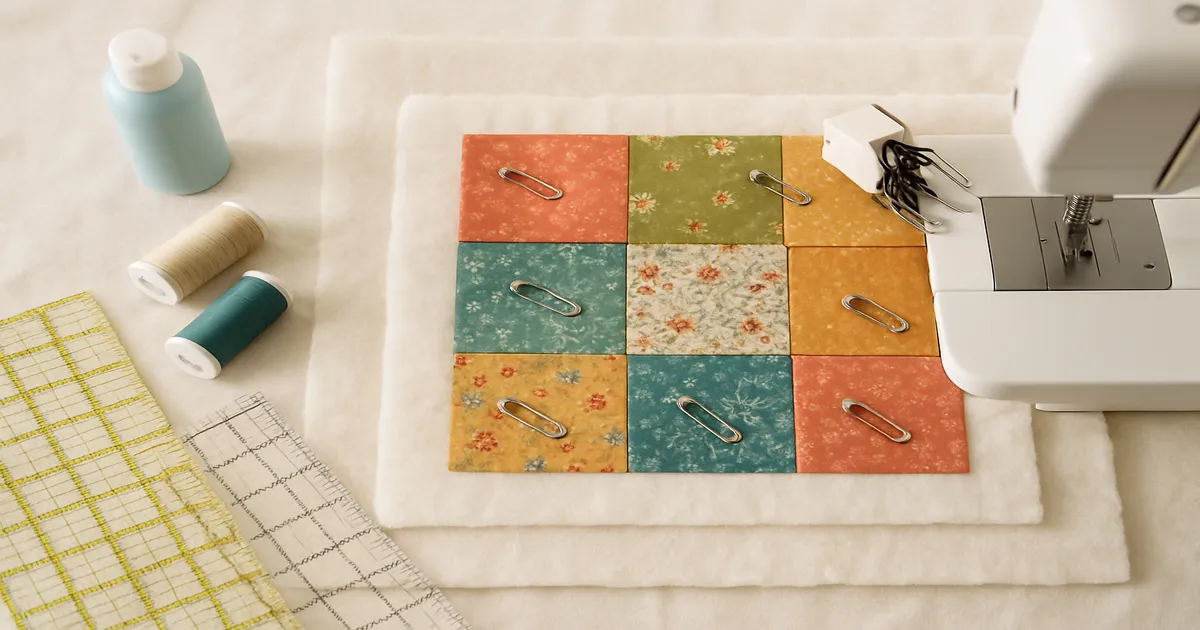
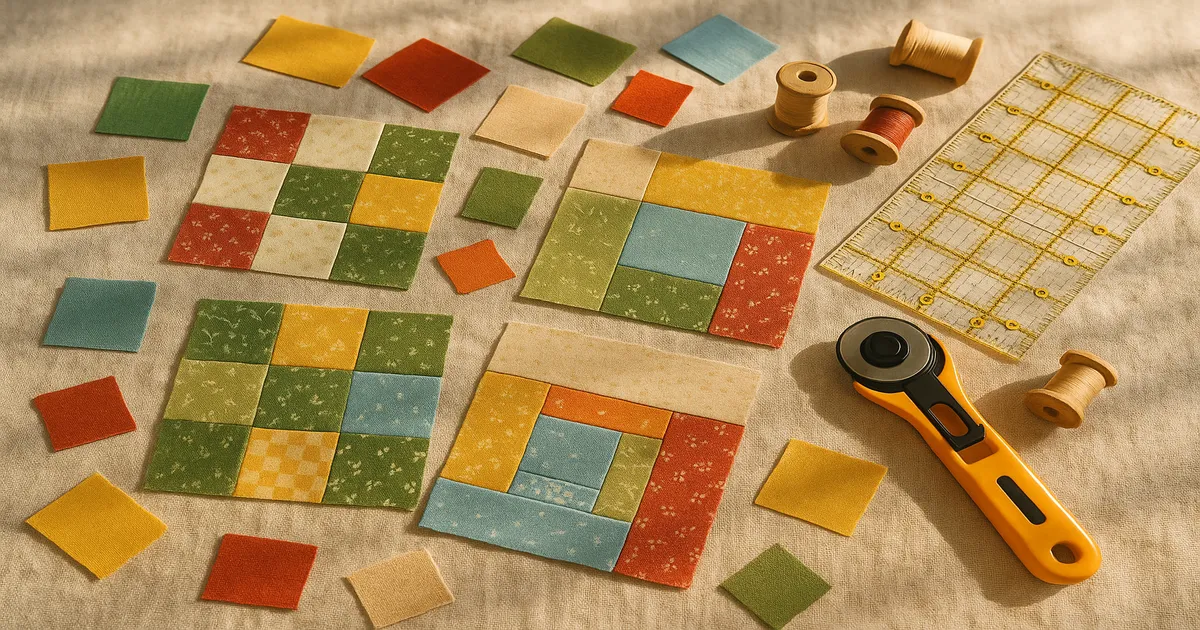
Pattern 1: Nine-Patch Block — The True Foundation
Finished size: 9 inches (22.9 cm) | Difficulty: ★☆☆☆☆
Nine squares in a 3×3 grid. That’s it. The Nine-Patch is the first pattern most quilting teachers reach for, and for good reason — it teaches the ¼-inch seam allowance in the most direct way possible. If your seams are right, your unfinished block measures exactly 9½ inches (24.1 cm). If they’re not, you’ll know immediately, which makes it a surprisingly good teacher.
Cutting: Cut squares 3½ × 3½ inches (8.9 × 8.9 cm). For a traditional two-color Nine-Patch, cut 5 squares of Color A and 4 of Color B.
Sewing:
- Arrange your 9 squares: A-B-A / B-A-B / A-B-A.
- Chain piece Row 1 — sew the first two squares right sides together, don’t cut the thread, feed the next pair right behind. Saves time and thread.
- Press Row 1 seams toward the darker fabric (Color B).
- Sew Row 2 and press seams in the opposite direction from Row 1. This is the step most beginners skip, and it’s exactly what makes your intersections lie flat.
- Sew Row 3, pressing seams the same direction as Row 1.
- Join the rows, nesting the opposing seams at each intersection — you’ll feel them click together. Pin at every intersection before sewing.
- Press final seams downward. Finished unfinished size: 9½ × 9½ inches (24.1 × 24.1 cm).
Pattern 2: Rail Fence Block — Perfect for Pre-Cut Strips
Finished size: 6 inches (15.2 cm) | Difficulty: ★☆☆☆☆
Honestly, the Rail Fence might be even easier than the Nine-Patch. Three strips sewn together, cut into squares, rotated — that’s the whole pattern. It’s especially satisfying with jelly roll strips because the cutting is already done for you.
Cutting: Cut strips 2½ inches × width of fabric (6.4 cm × ~107 cm) in three coordinating fabrics, or use pre-cut jelly roll strips.
Sewing:
- Sew three strips together along their long edges with ¼-inch (6mm) seams. Press seams in one direction.
- The strip set should measure 6½ inches (16.5 cm) wide. If it doesn’t, check your seam allowance before cutting.
- Subcut into 6½-inch (16.5 cm) squares — each strip set yields about 6 blocks.
- Arrange blocks by rotating alternating ones 90 degrees. The stripes run horizontal in some blocks and vertical in others, creating a woven look.
- Sew into rows and join the rows.
Pattern 3: Log Cabin Block — Classic and Endlessly Versatile
Finished size: 12 inches (30.5 cm) | Difficulty: ★★☆☆☆
The Log Cabin is where beginner quilting starts to feel like an art form. Strips (“logs”) spiral around a center square, with light fabrics on two sides and dark fabrics on the other two. When you arrange multiple blocks together, those light/dark halves create dramatic secondary patterns — and there are several to choose from. I’ve seen quilters get completely hooked on this block alone and never move on to anything else. That’s not a bad outcome.
Cutting:
- Center square: 2½ × 2½ inches (6.4 × 6.4 cm) — traditionally red, representing the hearth
- All logs: cut strips 1½ inches (3.8 cm) wide, then subcut to length as you build. Logs start at 2½ inches (6.4 cm) and increase by 1 inch (2.5 cm) with each addition, up to 12½ inches (31.8 cm) for the final logs.
Sewing:
- Sew Log 1 (light) to the right side of the center square. Press away from center.
- Rotate the unit 90 degrees counterclockwise. Sew Log 2 (light) to the new right side. Press away from center.
- Continue rotating counterclockwise, alternating two light logs then two dark logs per round, always pressing away from center.
- After all 20 logs, your unfinished block measures 12½ × 12½ inches (31.8 × 31.8 cm).
Arrangement options once you have multiple blocks:
- Barn Raising — concentric diamond rings of light and dark; the most dramatic layout
- Straight Furrows — diagonal stripes running across the whole quilt
- Pinwheel — four blocks arranged so the dark halves spin around a center point
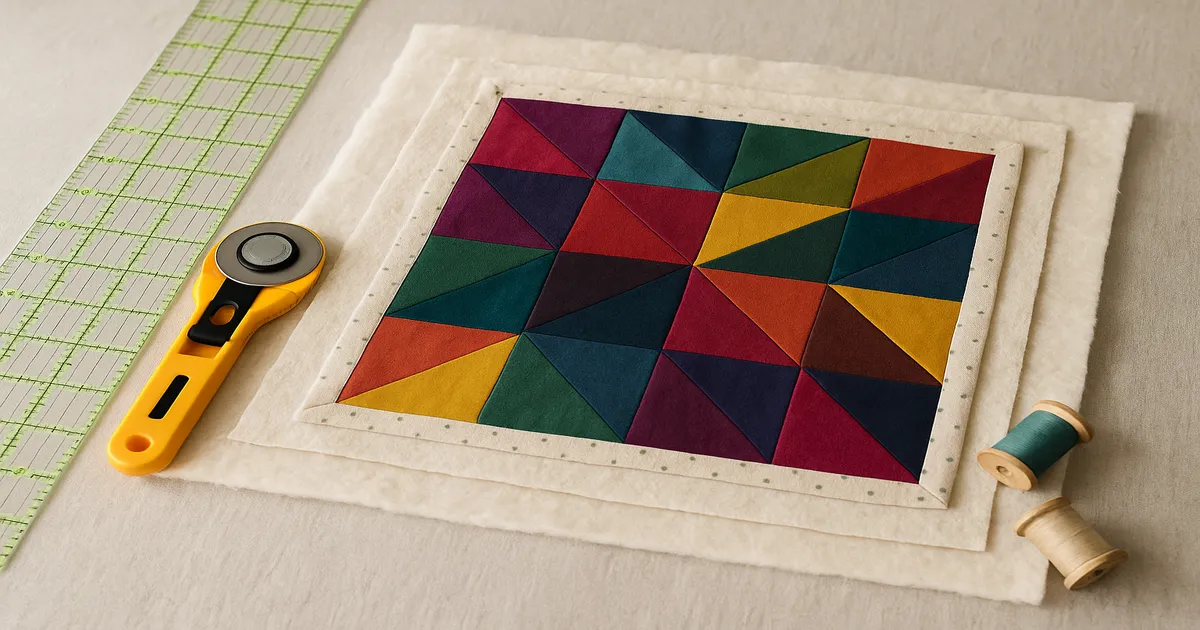
Pattern 4: Half-Square Triangles — Unlock Dozens of Designs
Finished unit size: 3 inches (7.6 cm) | Difficulty: ★★☆☆☆
Learning to make Half-Square Triangles (HSTs) is genuinely a turning point. Pinwheels, Ohio Stars, Bear Paws, Broken Dishes — they all depend on accurate HSTs. Master this one unit and you’ve unlocked a huge portion of the quilting catalog.
Cutting (two-at-a-time method): Cut two squares of contrasting fabric, each 3⅞ × 3⅞ inches (9.8 × 9.8 cm). The formula is finished size + ⅞ inch (2.2 cm). For 3-inch finished HSTs, cut 3⅞-inch squares.
Sewing:
- Place the two squares right sides together.
- Draw a diagonal line corner to corner on the wrong side of the lighter fabric.
- Sew ¼ inch (6mm) on each side of the drawn line. Use a stitch length of 2.0–2.2mm for a seam that won’t pull apart when you cut it.
- Cut along the drawn line. You now have two HST units.
- Press both open, seams toward the darker fabric.
- Trim to 3½ × 3½ inches (8.9 × 8.9 cm) using a square ruler with a 45-degree diagonal line — align that line with the seam and trim all four sides.
That trimming step is not optional. Skipping it is the single most common reason HST-based quilts end up with wavy seams and blocks that won’t lie flat.
Pattern 5: Flying Geese — Add Movement and Drama
Finished unit size: 3×6 inches (7.6×15.2 cm) | Difficulty: ★★★☆☆
Flying Geese are those classic arrow-shaped units — a triangle “goose” pointing up against a contrasting “sky” background. They add real visual energy to a quilt, and the no-waste four-at-a-time method means you’re being efficient while you learn.
Cutting:
- 1 large “goose” square: 6⅞ × 6⅞ inches (17.5 × 17.5 cm)
- 4 small “sky” squares: 3⅞ × 3⅞ inches (9.8 × 9.8 cm)
Sewing:
- Draw a diagonal line on the wrong side of all four small squares.
- Place two small squares on opposite corners of the large square, right sides together. The drawn lines should form one continuous diagonal across the center.
- Sew ¼ inch (6mm) on each side of the drawn line. Cut along the line — two units.
- Press the small triangles open on each unit.
- Place a third small square on the remaining large-triangle corner of each unit, right sides together, diagonal line running the correct direction.
- Sew ¼ inch (6mm) on each side, cut along the line, press open.
- You now have 4 Flying Geese units, each measuring 3½ × 6½ inches (8.9 × 16.5 cm) unfinished.
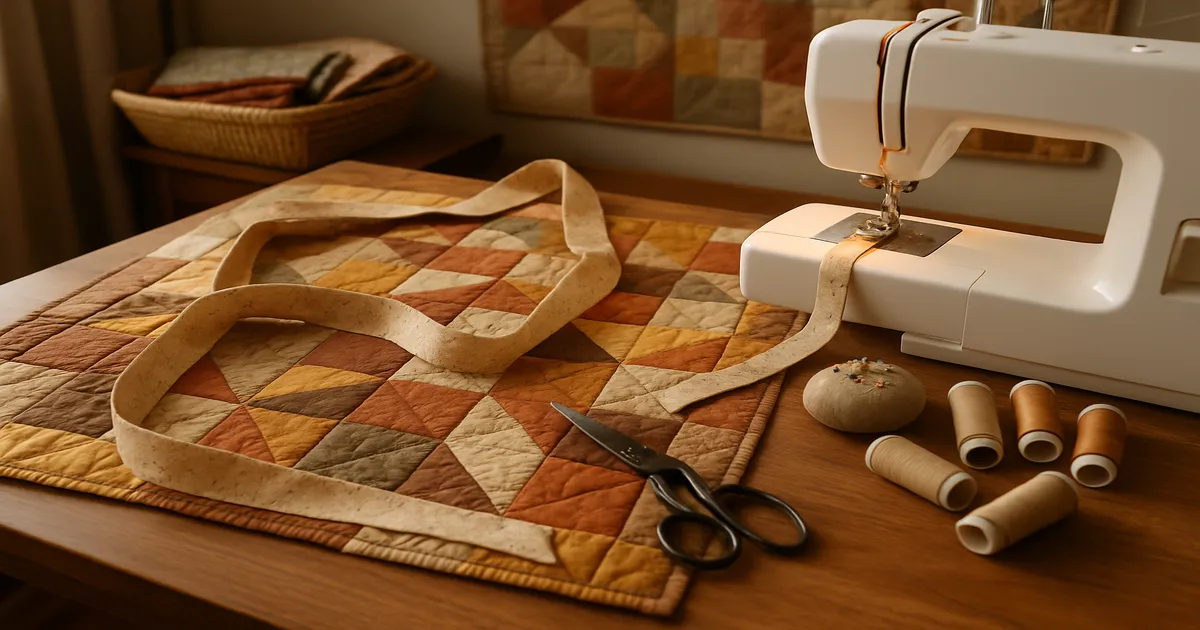
How to Assemble Your Quilt Top
Lay all your finished blocks out on the floor or a design wall before sewing a single seam. Then step back — really step back, across the room — and look for color clusters. If all your dark blocks have migrated to one corner, now’s the time to fix it. Shuffling blocks around costs nothing; unpicking a finished quilt top costs a lot.
Chain piece your blocks into rows the same way you chain pieced individual squares: feed pairs through the machine without cutting the thread between them. Press the seams of odd-numbered rows to the left and even-numbered rows to the right. When you join the rows, those opposing seams will nest together at every intersection — a slight resistance that tells you they’re locked. Pin at every intersection with the pinned side facing up so you can see exactly what’s happening as you sew.
Once the top is together, use a large cutting mat and a long ruler to trim any uneven edges and confirm your corners are true 90-degree angles. It takes ten minutes and it’s the difference between a quilt that hangs straight and one that ripples.
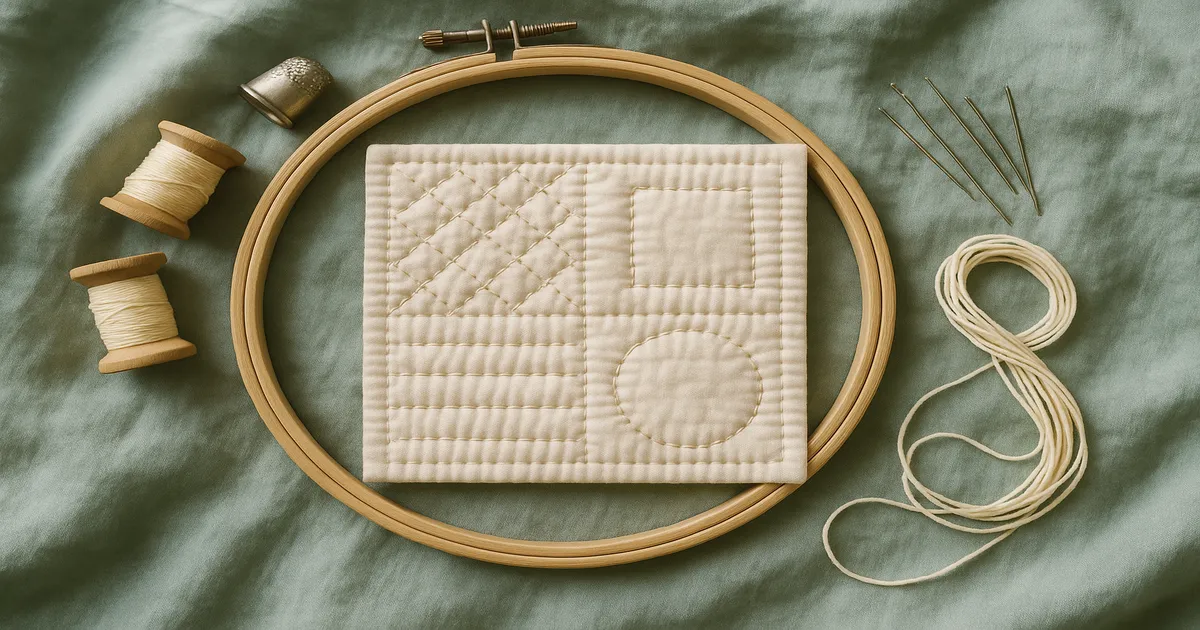
Basting and Quilting Your First Quilt
Press your backing fabric and lay it wrong-side-up on a hard floor, taping the edges taut (smooth, not stretched). Center your batting on top, leaving 2–3 inches (5–7.6 cm) extending beyond the quilt top on all sides. A cotton or cotton-blend batting is the right call for a first quilt — it’s easy to handle, doesn’t shift, and quilts through smoothly on a home machine. Polyester battings can be lofty and warm, but they’re slippery and make machine quilting feel like wrestling.
Center the quilt top right-side-up over the batting. For machine quilting, pin baste with size 1 curved safety pins placed every 4–6 inches (10–15.2 cm) across the entire surface. The curved shape makes them much easier to close than straight pins.
For quilting itself, start with stitch-in-the-ditch — sewing directly in the seam lines of your patchwork. The stitching essentially disappears from the front, there’s no marking required, and small wobbles hide in the seam. Use a walking foot, a neutral 50-weight cotton thread, and a stitch length of 3.0mm. Once you’re comfortable, try parallel straight lines spaced ½ to 1 inch (1.3–2.5 cm) apart for a clean, modern look. Free-motion quilting — stippling, feathers, custom designs — is genuinely satisfying, but save it for your third or fourth quilt. Trying it on your first will mostly produce frustration.
Common Mistakes Beginners Make (And How to Avoid Them)
Inconsistent seam allowances. A ¼-inch seam allowance isn’t a suggestion — it’s the foundation every measurement in quilting is built on. Even a 1/16-inch (1.6mm) deviation, repeated across 42 blocks, compounds into blocks that simply won’t fit together. Use a dedicated ¼-inch foot and check your seam width on a scrap before every session.
Skipping pressing. Pressing is not the same as ironing. Ironing means moving the iron back and forth, which distorts bias edges and stretches seams out of shape. Pressing means setting the iron down, applying pressure, lifting, and moving. Press each seam before crossing it with another. This single habit separates flat, professional-looking quilts from puckered ones.
Not trimming HSTs. Already mentioned above, but worth repeating: always trim your Half-Square Triangle units before sewing them into blocks. Every time.
Cutting on a soft surface. A rotary cutter on a soft mat or a folded towel gives you inaccurate cuts. Use a proper self-healing mat on a hard, flat table.
Frequently Asked Questions
What is the easiest quilt pattern for a complete beginner? The Nine-Patch is the easiest starting point — nine squares, one seam allowance, immediate feedback. If you want something even faster, the Rail Fence is a close second and works beautifully with pre-cut jelly roll strips.
How much fabric do I need for a beginner quilt? For a lap quilt (approximately 54×72 inches / 137×183 cm) made of Nine-Patch blocks, plan on 2–3 yards (1.8–2.7 m) each of two coordinating fabrics. For the backing, you’ll need about 3½ yards (3.2 m) of 44-inch-wide fabric, or 1¾ yards (1.6 m) of 108-inch-wide backing fabric.
Do I need a special sewing machine for quilting? No. Any sewing machine that sews a straight stitch can make a quilt. The one accessory that genuinely matters is a ¼-inch presser foot — it makes accurate seam allowances almost automatic. A walking foot is the second most useful addition, especially for the quilting stage.
What does “unfinished size” mean in quilting? Unfinished size is the measurement of a block before it’s sewn into the quilt — it includes the ¼-inch seam allowance on all four sides. A block with a 9-inch finished size measures 9½ inches unfinished. Always cut and measure to the unfinished size until the block is sewn into the quilt top.
How long does it take to finish a first quilt? Realistically, expect 2–3 weekends for a lap-quilt top using one of the simpler patterns here. Basting, quilting, and binding add another weekend. Don’t rush it — the point of a first quilt is to learn the skills, not to set a speed record.