Quick Answer: Yes, you can absolutely hand sew a quilt top using larger paper pieces — and it’s one of the most satisfying ways to work with English Paper Piecing. Larger templates mean fewer seams, faster construction, and a much more manageable project. The technique works exactly the same as traditional EPP; you’re just scaling up the shapes.
Hand sewing a quilt top with larger paper pieces is a well-established variation of English Paper Piecing (EPP) that more quilters should try. The technique goes back to at least 1718 — the Levens Hall quilt in Cumbria, England is one of the oldest surviving examples — and nothing about it requires you to work tiny. If you’ve ever looked at a pile of 800 one-inch hexagons and quietly put the project back in the drawer, large-scale EPP might be exactly what you need.
What Is English Paper Piecing and How Does Scaling Up Work?
EPP is straightforward: cut stiff paper templates to your chosen shape, baste fabric over them with the seam allowance folded to the back, then whip-stitch the prepared pieces together along their folded edges. Once the quilt top is assembled, the papers slide out and you’re left with a precisely pieced top — no machine, no pinning to a design wall, no ironing board at the piecing stage.
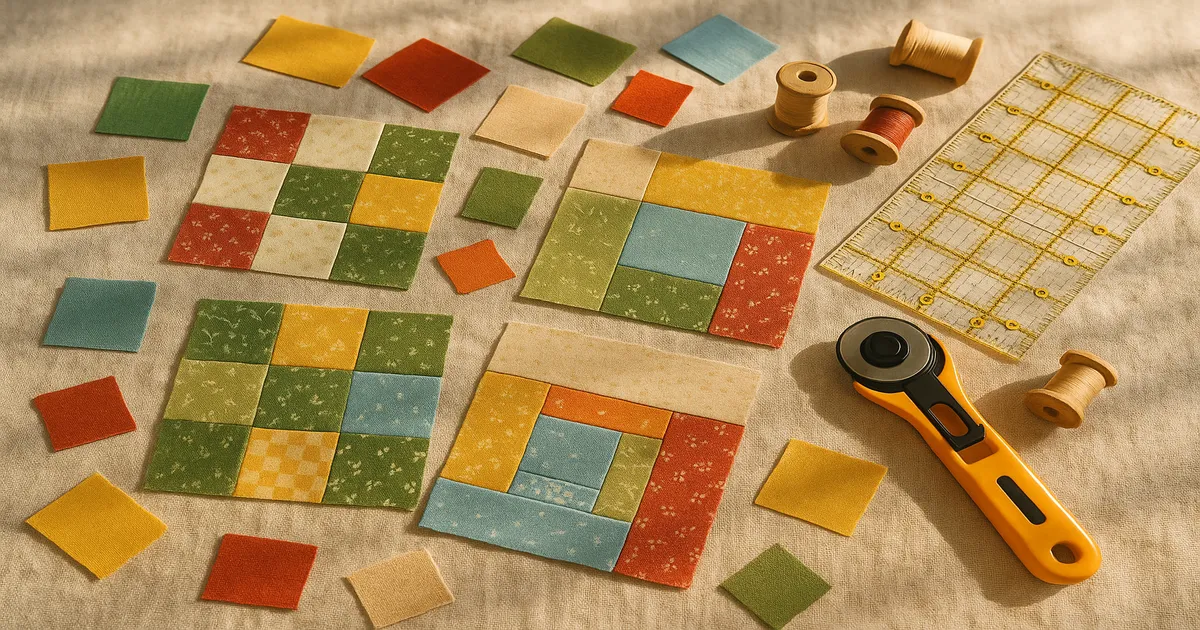
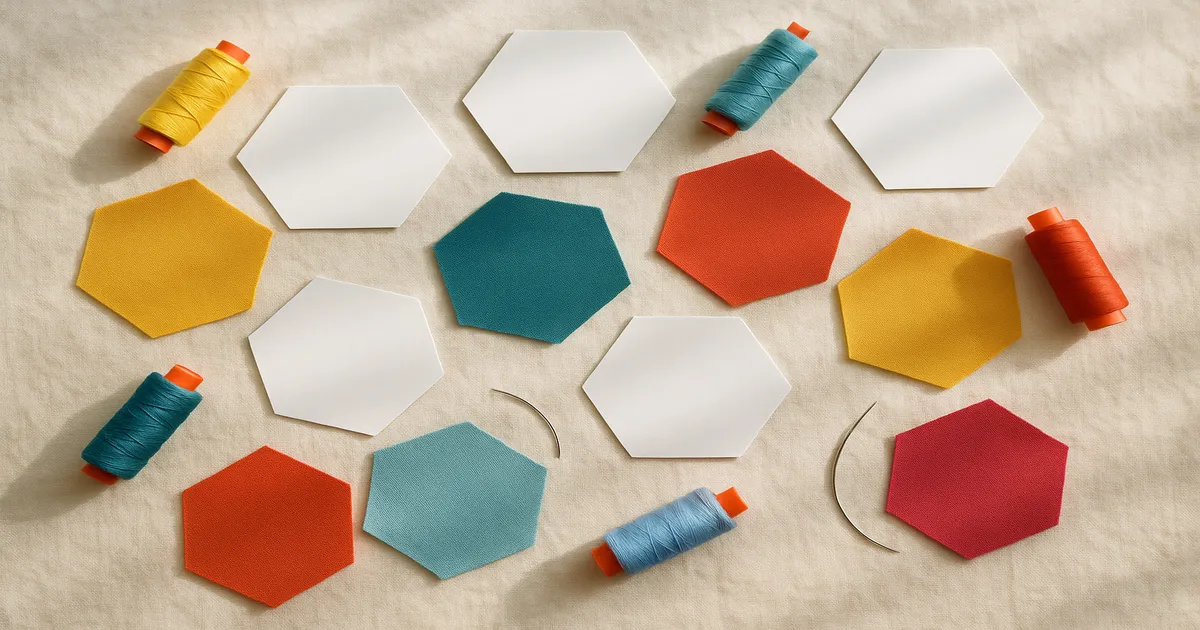
The 1-inch (25mm) hexagon became iconic partly because EPP was historically used for scrap quilts where tiny pieces made sense. But there’s no rule that says you have to work at that scale. The method scales up with zero fundamental changes. A throw quilt at roughly 60 × 80 inches (152 × 203cm) using 1-inch hexagons can require 800 to 1,200+ individual pieces. Switch to 3-inch (76mm) hexagons and that number drops to around 250–320 pieces for the same quilt. Fewer seams, bolder design, and you actually get to see the fabric you fell in love with.
Best Shapes and Sizes for Hand Sewing a Quilt Top With Larger Paper Pieces
If you’re new to EPP, start with a 3-inch (76mm) flat-to-flat hexagon or a 4-inch (102mm) equilateral triangle. Both are forgiving at the corners, easy to baste, and give you enough surface area to feel confident without the complexity of acute angles.
More experienced makers can push into 5- to 6-inch (127–152mm) diamonds or elongated hexagons — shapes that look stunning but need a bit more finesse at the points. A stiletto becomes your best friend here.
Large-scale EPP works particularly well with:
- Large hexagons — the classic choice, endlessly versatile
- Oversized diamonds and tumbling blocks — bold, graphic, great for playing with light and dark placement
- Elongated triangles — create dynamic movement across the quilt top
- Large elongated hexagons — a modern favourite that pairs beautifully with bold solids
This is also where large EPP really earns its keep for fussy cutting. A 4-inch (102mm) hexagon gives you enough real estate to centre a floral motif, a novelty print character, or a geometric repeat that would be completely lost in a 1-inch piece. Use a see-through acrylic template or a window template (just cut out the centre of a paper template) to position the motif exactly before cutting.
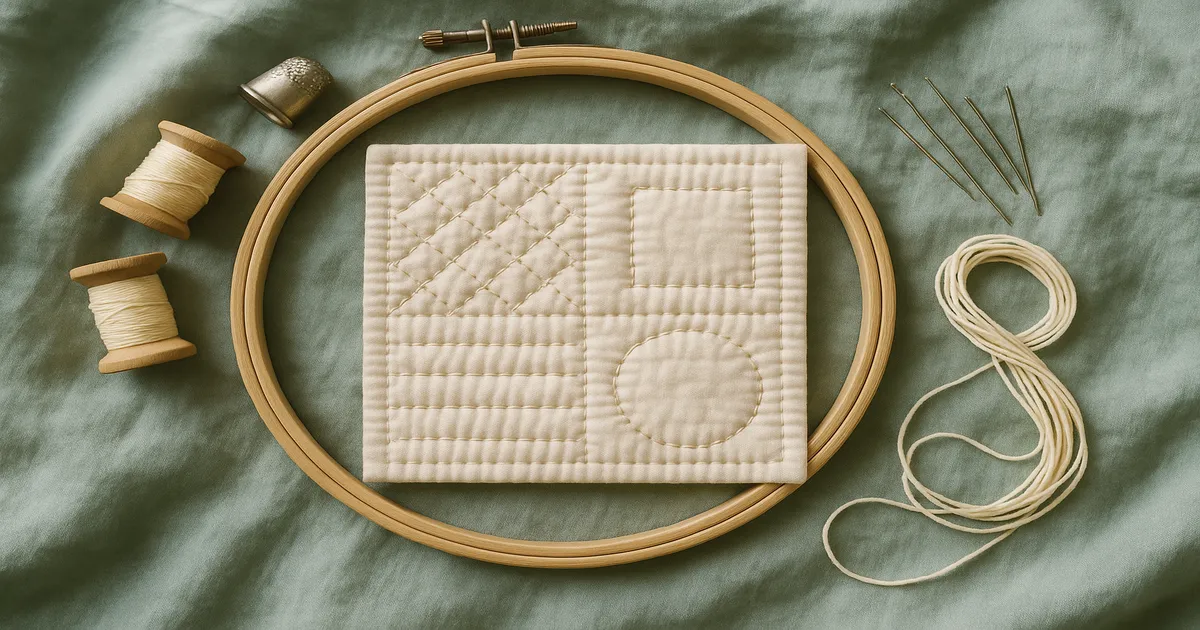
Materials and Tools You’ll Need
Paper templates
- Card stock (67–110 lb / 90–160 gsm): Best for single-use templates. Holds its shape through repeated handling and pressing.
- 80 lb (120 gsm) copy paper: Works fine for larger pieces where the size itself adds rigidity.
- 0.5mm acetate sheets: Cut with a craft knife and ruler for reusable templates that wash clean.
- Pre-cut commercial templates: Paper Pieces, Sew and Quilt, and Inklingo all sell accurately cut templates in a wide range of sizes — worth every penny if you’re making hundreds of pieces.
Whatever you use, cut templates with a rotary cutter against an acrylic ruler. Even a 1/32-inch (0.8mm) error will compound across a quilt top in ways that’ll drive you absolutely mad by row three.
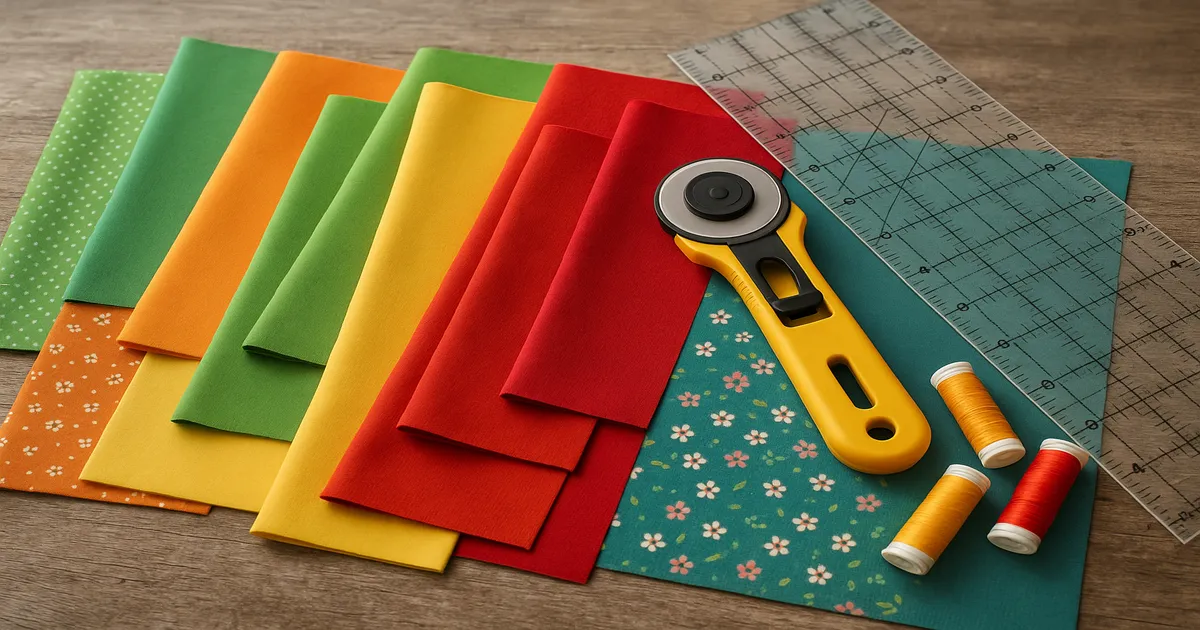
Fabric
100% quilting cotton is the gold standard — it folds crisply, holds its shape, and is easy to needle. Linen-cotton blends are beautiful but need a slightly larger seam allowance at corners. Shot cottons and solids are perfect for showcasing bold geometric shapes. Fine lawn works wonderfully at diamond points because it folds so cleanly. Avoid knits, loosely woven fabrics, and — especially if you’re a beginner — batiks. Batiks are dense and genuinely tough on needles. Pre-wash everything before you cut.
Needles and thread
For thread, Aurifil 50wt 2-ply cotton is what most serious EPP quilters reach for. It’s fine enough to sink into the fold and strong enough to hold. Match your thread to the darker of the two fabrics being joined, or use a neutral grey or tan that plays well across multiple colours.
For needles, a Sharps size 7 or 8 is the standard. Size 7 is slightly longer and easier for beginners; size 8 is finer and better for tight corners. Some experienced quilters prefer Milliners/Straw needles in size 9 or 10 for the longer shaft. Skip Betweens — they’re too short for comfortable EPP work.
Other notions you’ll actually use
- Rotary cutter (45mm) and self-healing mat (at least 18 × 24 inches / 46 × 61cm)
- Shape-specific quilting rulers (hexagon, triangle)
- Metal or Roxanne thimble for sustained hand sewing
- Stiletto or awl for tucking points
- Washable fabric glue stick
- Wonder Clips for holding large pieces together while stitching
- Needle minder for portable work
Step-by-Step: How to Hand Sew a Quilt Top Using Larger Paper Pieces
Step 1: Design your layout and prepare templates
Plan your colour placement before you cut a single piece of fabric. EQ8 (Electric Quilt software) or the free Quiltography app both let you map out a design digitally — genuinely worth doing if you care about your fabric budget. Cut or source your paper templates and double-check they’re accurate.
For a throw quilt using 3-inch (76mm) hexagons, prepare around 250–320 paper templates. A 3-inch flat-to-flat hexagon has sides of approximately 1.73 inches (44mm), so use a hexagon ruler or online calculator to confirm your measurements before cutting a stack.
Step 2: Cut fabric with the correct seam allowance
Seam allowances for large-scale EPP are slightly more generous than the traditional 1/4-inch (6mm) standard:
- Pieces up to 3 inches (76mm): add 3/8 inch (10mm) on all sides
- Pieces 4 inches (102mm) and larger: add 1/2 inch (13mm) on all sides
This gives you enough fabric to fold cleanly and baste securely. Cut with a rotary cutter and shape ruler for consistency. If you’re fussy cutting, use your window template and a light box or bright window to centre the motif.
Step 3: Baste fabric to paper
Centre the paper template on the wrong side of the fabric, fold one edge of the seam allowance over the paper, and baste through all layers with a running stitch about 1/4 inch (6mm) long. Don’t knot the thread at the start — leave a 2-inch (51mm) tail so you can pull it out easily later. Use light-coloured thread; dark thread can shadow through pale fabrics, especially after pressing.
At corners:
- Hexagons and obtuse angles: create a small mitered fold and secure with a single stitch through the fold
- Acute angles (diamonds, elongated hexagons): fold the point first, then each side; use a stiletto to tuck the point cleanly, and a dab of glue stick to hold it
Glue basting is a legitimate alternative, especially for large pieces. Apply a thin line of washable glue stick along the paper edge, fold the seam allowance over, and finger-press firmly for 30–60 seconds. It’s faster than thread basting and works beautifully at this scale — just don’t use too much or it’ll seep to the front and gum up your needle. My preference is to glue-baste the straight edges and thread-baste the corners: the speed of glue where it’s easy, the precision of thread where it actually matters.
Step 4: Join pieces with a whip stitch
Thread your needle with about 18 inches (46cm) of thread — longer and it’ll tangle and wear thin. Tie a quilter’s knot at the end (wrap the thread around the needle two or three times and pull through).
Hold two prepared pieces right sides together, aligning the edges. For large pieces, clip the edges with Wonder Clips before you start. Then:
- Insert the needle through the folded edge of the back piece, catching just 2–3 threads of the fold — not through the paper
- Bring it through the folded edge of the front piece in the same motion
- Aim for about 8 stitches per inch (3 per cm) — firm but not puckering
- Secure at both ends with 2–3 backstitches
Step 5: Handle Y-seams and build the quilt top
Y-seams — where three pieces meet at a point — come up constantly in hexagon and diamond layouts. Sew each seam individually, stopping exactly at the corner point. Don’t sew through the intersection and don’t lock the seam allowances down. Let them fan out flat, finger-press the intersection, then add the next piece.
Build hexagon layouts in diagonal rows; for medallion-style designs, work outward from the centre. Either approach works — just be consistent so your rows align.
Step 6: Remove papers and finish the quilt top
For thread-basted pieces, snip the basting thread every 3–4 stitches and pull the tail free. Glue-basted papers slide out even more easily once the surrounding seams are done. Only remove a template once that piece is fully surrounded by finished seams — border pieces stay in until the entire top is assembled.
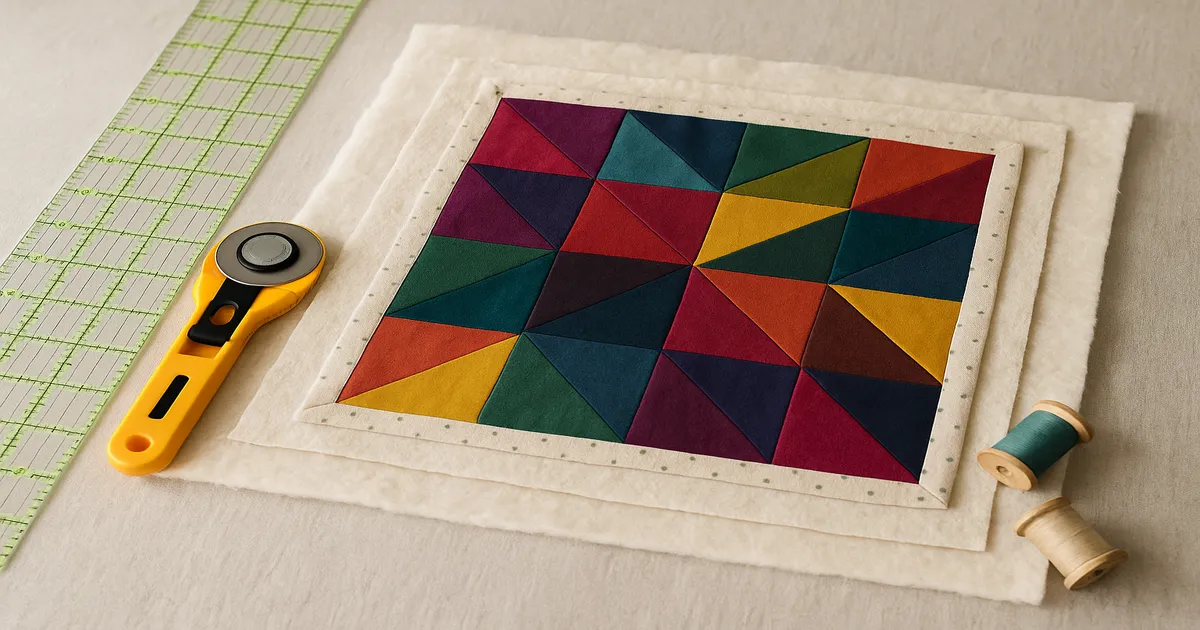
Press the finished quilt top with a medium-hot iron and a pressing cloth, spritzing lightly with water to relax the fold lines. Press from the back first, then the front. Square up with a large quilting ruler and rotary cutter.
Common Mistakes to Avoid
Inaccurate templates are the mistake that haunts you later. A 1/32-inch (0.8mm) error on a single template seems trivial until it’s compounded across 300 seams. Always use a rotary cutter against a hard ruler — never scissors alone for cutting templates.
Cutting fabric the same size as the paper template is a surprisingly common beginner error. That’s the finished size. Your fabric pieces need to be larger by your chosen seam allowance on all sides.
Catching the paper in your whip stitch makes removal nearly impossible. The needle should only ever catch the folded fabric edge. Stitches more than 1/4 inch (6mm) apart on large pieces create weak seams that can pop open during quilting.
Skipping the dry-fit is always a mistake. Assemble your full layout on a flat surface before you start joining pieces. Discovering a colour-placement error after 50 stitched seams is a special kind of frustrating.
Frequently Asked Questions
What size paper templates are best for a beginner hand-sewn quilt top?
A 3-inch (76mm) flat-to-flat hexagon is the best starting point. It’s large enough to handle easily, forgiving at the corners, and produces a quilt top without requiring hundreds of tiny pieces. A 4-inch (102mm) equilateral triangle is another solid beginner choice.
How many paper pieces do I need for a throw quilt?
For a throw quilt approximately 60 × 80 inches (152 × 203cm) using 3-inch (76mm) hexagons, you’ll need roughly 250–320 paper templates. Traditional 1-inch (25mm) hexagons would require 800–1,200+ pieces for the same size — which is exactly why scaling up is worth considering.
Can I reuse paper templates for English Paper Piecing?
Yes, with the right material. Card stock templates are typically single-use — they soften and distort slightly after basting and pressing. Cut 0.5mm acetate sheets with a craft knife for durable, washable, reusable templates that hold their dimensions well. Pre-cut acrylic templates are also reusable and very accurate.
What’s the best thread for hand sewing a quilt top with paper pieces?
Aurifil 50wt 2-ply cotton is the go-to for most EPP quilters. It’s fine enough to sink into the folded edge without creating bulk and strong enough to hold up to years of use. Match the colour to the darker of the two fabrics being joined, or use a neutral grey or tan that blends across your palette.
How do I remove paper templates without damaging the seams?
For thread-basted pieces, snip the basting thread every 3–4 stitches and pull the tail free, then slide the paper out. Glue-basted papers usually slide out easily once the surrounding seams are complete. The key rule: only remove a template once that piece is fully surrounded by finished seams.